I ended up using mine as part of a very modified Pedal shaft set up I built I posted a long photo heavy post in my Chug A Lug project thread on the 2A forum.
I guess I can see if I can cut and paste it here to.
So I been up to my Bee Hind in finishing up the fancy Clutch/Brake pedal arm to the Clutch Pedal Shaft and the mount to the frame. I'm pretty happy with the way it all can out.
So here it is my new upgraded and modified factory Clutch and Brake shaft assembly.
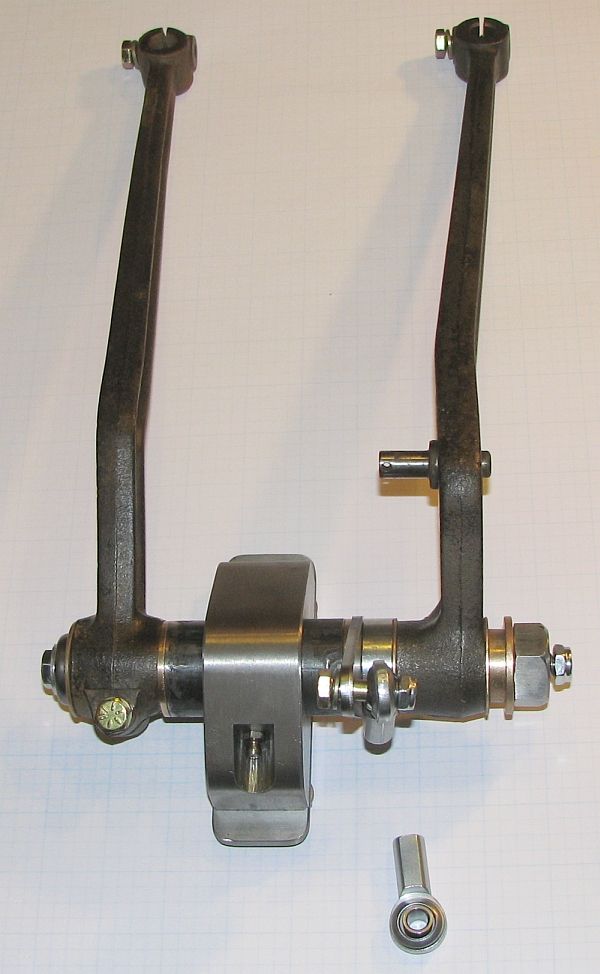
A little closer view of the assembly. This uses the Willys Factory Pedal Slop fix kit (thats the long bolt running through the center of the assembly and the cupped washer and the hollow adjustment nut followed by the Nylon insert Jam/locking nut) I have done away with the cotter pins and the steel washers. All wear surfaces and pivot points are Bronze Oilite Bearings. And all are serviced by a Gease Zerk.

Just a view from the other side
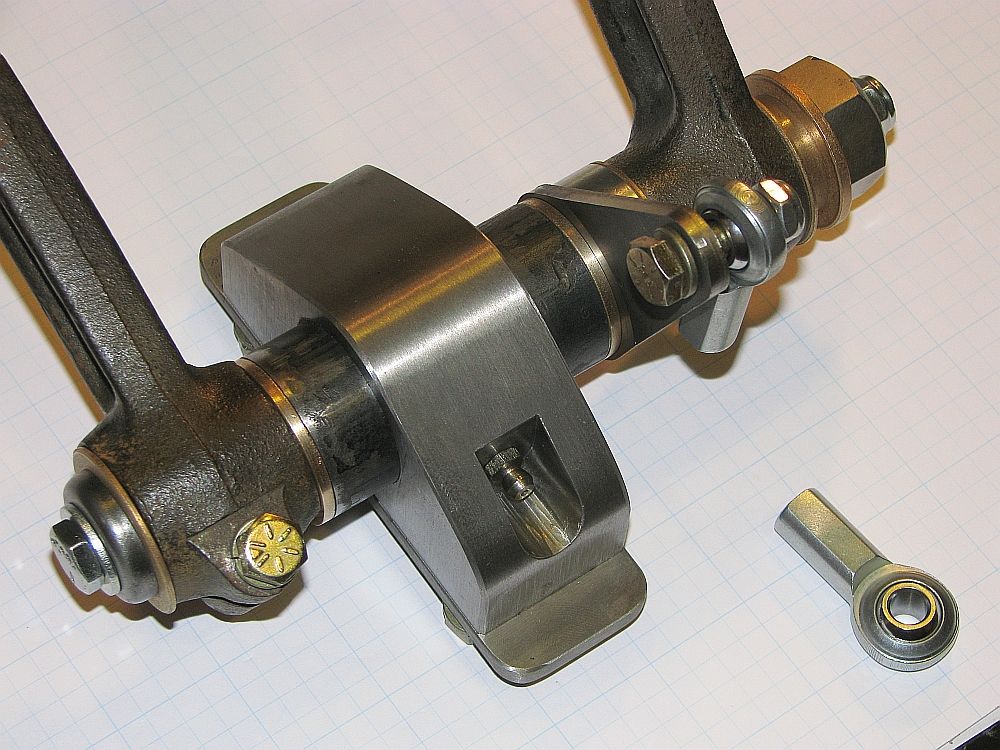
Bottom view ? Well actually this will be the view from the top when installed. The Mount attaches with 4) G8 5/16"-18T bolts cut to fit the application. You can see the spacer I made from a 7/8" ID x 1 1/2" OD shaft collar. It was just easier to start from the Collar then to make one from scratch on the lathe. But it worked out real well allowing me to lock the collar to the shaft and keeping it from rotating and causing wear. I ended up changing the plate shown with the 4 bolts in it. When I built the Master Cylinder mount I put in.
http://i65.photobucket.com/albums/h217/UJ78/Willys%20project/Clutch%20and%20Brake%20shaft%20assembled%20web%204_zpsw8ba59kc.jpgThe space you see to the right of the Brake Pedal arm is where the brace will attach between the shaft assembly and the master cylinder mount. I'm going to be making this from 1/4" T stock and I bought some 10-32T tiny grease zerks so it can be serviced.
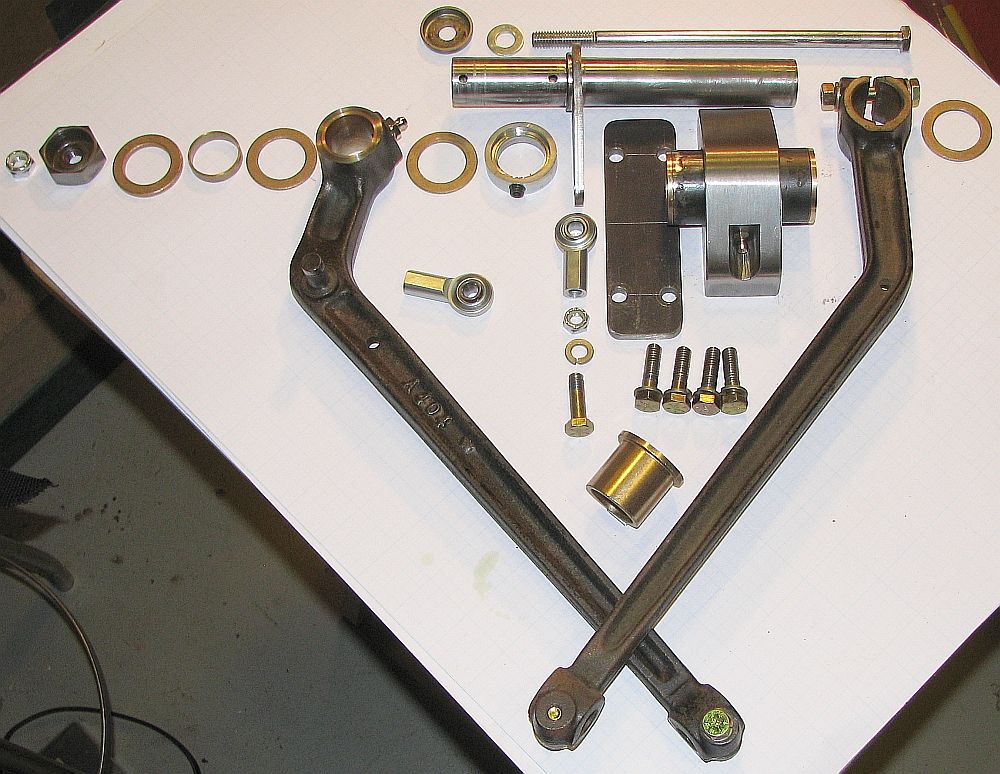
OK here is everything laid out.
From the left
3/8"-16T Nylon insert Lock nut
Cupped threaded adjustment Nut for the Willys Pedal Slop Fix Kit
.125"T X 1.00" ID X 1.50" OD Thrust Bearing
.250" W X 1.00" ID X 1.125" OD Bronze Bushing
.065"T X 1.00" ID X 1.50" OD Thrust Bearing
Brake Pedal Arm with 1.00" ID X 1.25" OD Bronze Bearing Pressed into the Arm. Then faced off.
.065"T X 1.00" ID X 1.50" OD Thrust Bearing
Special Shaft collar made with a set cut inside to allow room for weld line on Clutch Lever
Next would come the Clutch Lever mounted on the Clutch Shaft (show in the above line)
Clutch Shaft Assembly to Frame mount
Bronze 1" ID x 1 1/4" OD w/ 1/8" T x 1 1/2" Flange OD
Tube made from 1.5" x 2.75" 1020 Cold Rolled shaft material Bored to an ID of 1.250" Bronze bushings were then Pressed in place. Once assembled the ends of the Tube were faced off square with the Bore.
Bronze 1" ID x 1 1/4" OD w/ 1/8" T x 1 1/2" Flange OD
Once the Tube was assembled and the base of the Mount was roughed out. I took to press the Tube Assembly into the Mount. I guessed as to exactly what the interference fit would be (could have taken a .001 to .002" off the tube and been safe). I placed the Tube in the Freezer. Once it was as cold as it was going to get I put everything in my large bench vise and started pushing the Tube into place. I got about 3/8" in of the 2" it needed to travel to end up centered.
then out came the propane torch and more reefing on the vise. And it got to the point I was tightening the vise ASAP and then wacking the vise with a hammer to shock it into moving. Much like you would break free a gear puller. This got me to about 5/8" from done. When the Vise came off the bench (not to worry it did that once before about 15 years ago) So I resigned myself to have to take it up to the shop at work tomorrow and press it in with the big Hydraulic press..
Wife screams for dinner/Eat dinner
Great Idea. I assemble a reverse gear puller using some of the parts from my Milling machine hold down set. And with it sitting in the vise (now clamped to the bench) and using 2" 18" box end wenches I managed to get it almost perfect. BUT WHAT A PITA. I need a small press.
OK I have run into some kind of post size limit so this will be continued in the next post


