Comparing the metering rod setting tools
In an effort to find the easiest or best way to set the metering rod I did a comparison of the Carter tool, the Snap-On tool and the Home made tool. I have three metering rods and jets to use to compare with a borrowed Carter tool and a Snap-On tool and my own Home made tool.
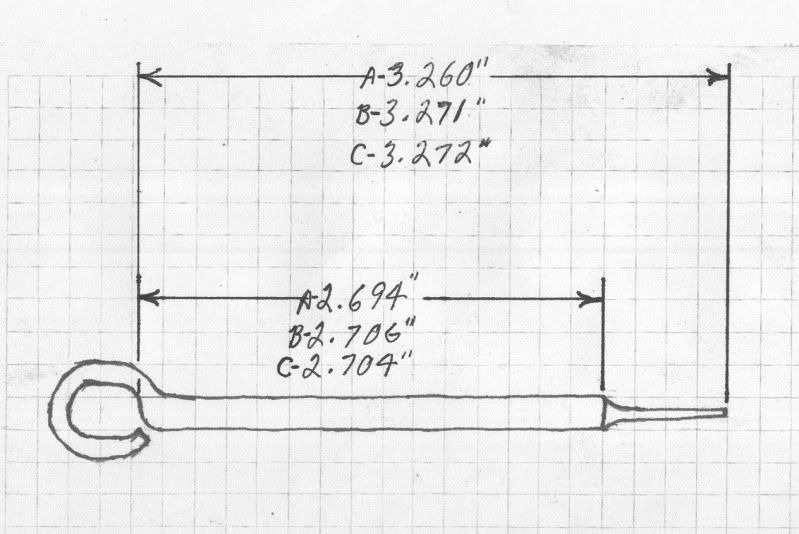
The jet has a tapered opening of 116 deg with a hole of .070� +.000 -.0002� as measured in the three jets I have. The metering rods vary in length from the start of the tapered area to the spot the pin rests on. The OAL length of the rod from the spot the pin rests on to the tip also varies as shown below in the drawing. I also used one of the cleaner jets to measure the OAL of the bottom on the jet to the shoulder of the tool for a reference and they are as follows:
Carter tool, shoulder to bottom of jet = 2.947�.
Snap-On tool, shoulder to bottom of jet = 2.946�.
Home made tool, shoulder to bottom of jet = 2.945�.
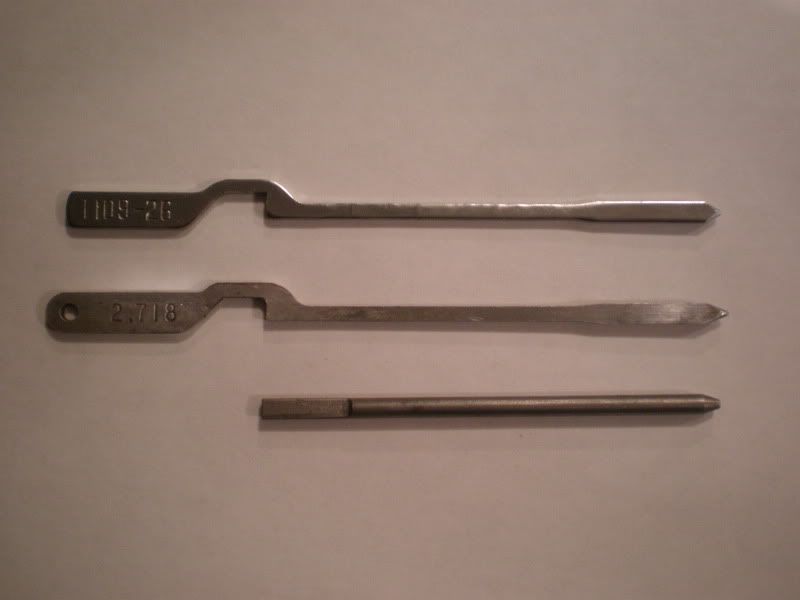
Below is a photo of the Carter, Snap-On and Home made tool. The tip angles and lengths of the tools vary as follow.
The Carter tool has a tip angle of 58 deg with an OAL from the shoulder to tip of 2.782�. The length of the shoulder to contact area in jet is 2.720� and may be 2.718� as it�s hard to read a line scratched in * clearly on the surface of an extremely rough finish.
The Snap-On tool has a tip angle of 42 deg with an OAL of 2.804� from shoulder to tip. The length of the shoulder to contact area of the jet is 2.718� and was clear to read because the tip was very smooth.
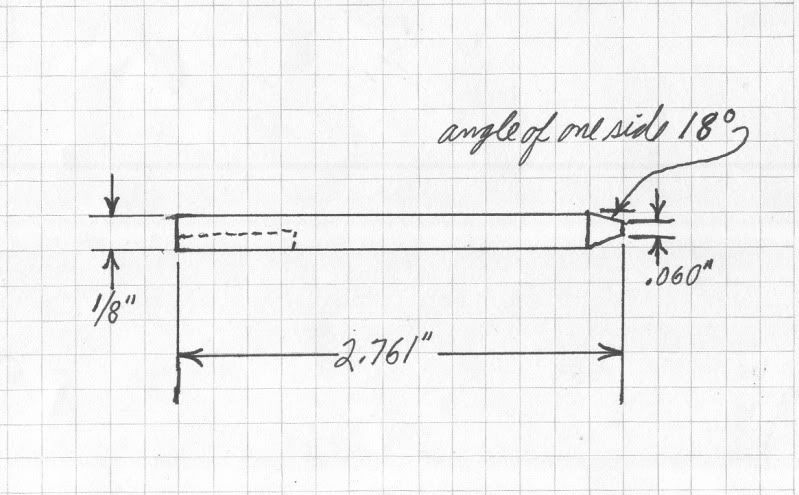
The Home made tool I made has a tip angle of 36 deg with an OAL of 2.761�. The length of the top end to the contact area of the jet is 2.719� The tip on my tool is as smooth as the Snap-On tool.
I measured them several times to be sure I was as correct as possible. I used dial calipers along with a 10 power glass and a jig to hold the rods as I made the measurements. I also used a Peak brand 10 power comparator to do the small measurements. I was as careful as I could but some readings could be off a thousandth or two.
Here is a drawing of the Home made tool from the internet that I made to save you from looking it up. I paid close attention to getting is exact as possible and it must have worked as will be shown in the following tests of all three tools. You will note a dotted line on the drawing that indicates where I gound away half of the diameter for about �� down the shaft to clear the backing washer on the pin where the metering rod sits. Since the Carter and Snap-On tools are flat stamped metal and the rod is 1/8� diameter there will be some interference so don�t force it or you will get a false reading.
Now for comparing them on the carb on my Jeep. When I checked my current setting it had .005� free travel of the rod with the throttle screw backed off all the way to close the throttle plate. That means with a dial indicator on the top of the rod I could move the rod up .005� while holding the throttle closed.
When I put the Carter tool in place of the metering rod I had to loosen the nut and reset the pin and tighten the nut. When I checked the free travel using the metering rod I now have .040� free travel using the dial indicator as noted above.
Then I removed the metering rod and installed the Snap-On tool and the setting was the same as with the Carter tool. As I moved the tool I could just feel it touching the bottom of the pin.
Then I removed the Snap-On tool and installed the Home made tool and the result was the same. Moving the Home made tool under the pin I could just fell the tool as it rubbed the bottom of the pin.
All three tools gave the same setting of the metering rod pin. I wasn�t expecting that they would be that close but they are.
If you don't own a Carter tool, Snap-On tool or home made tool you could set the metering rod with a dial indicator on a mag base. It has to be a mag base with adjustable arms that most likely only a machinist would own. Use a very flat metal bench or a drill press table. Clamp the carb to the table and use the dial indicator with the plunger tip on the top of the metering rod. It has to be lined up exactly straight in line with the metering rod. Loosen the nut on the pin so it has a slight drag and then move the pin down to touch the metering rod. Then raise the metering rod until you have traveled .040" on the indicator and lock the pin nut. Check the travel again to be sure it is .040" and if not repeat until it is .040". You should then be at the setting you would have using a factory or home made tool.
Because of the differences in the dimensions of the metering rods and possibly the jet don't expect replacing the metering rod and jet in an overhaul without resetting the pin to end up with the correct setting. It could be way off.


