The CJ3A Page CJ3B.info

Author Topic: Hawk's CJ3A 13655  (Read 219498 times)

0 Members and 1 Guest are viewing this topic.

Offline Kirkski

  • Flatfender Master
  • *****
  • Posts: 526
  • Karma: +0/-0
  • Still Plays With Jeeps
    • View Profile
Re: Hawk's 1949 CJ3A
« Reply #225 on: August 18, 2014, 08:33:48 PM »
Thank you, I appreciate your help!
'52 CJ-3A

Offline Tumbleweed

  • Flatfender Master
  • *****
  • Posts: 516
  • Karma: +0/-0
  • 49 CJ3A
    • View Profile
Re: Hawk's 1949 CJ3A
« Reply #226 on: October 06, 2014, 02:07:57 PM »
Hey Tim,

Any updates on the your new build? I just got my engine back a couple of weeks ago - now I am dry fitting all the parts to make sure I have everything required. Hope to see your most recent pictures.

George
49 CJ3A - "Smokey"
53 Willys Wagon - "Wylie"

Offline athawk11

  • SMF Administrator
  • Flatfender Master
  • *****
  • Posts: 2818
  • Karma: +0/-1
  • 1949 CJ3A
    • View Profile
Re: Hawk's 1949 CJ3A
« Reply #227 on: October 06, 2014, 09:13:27 PM »
Hi George,
Good to hear from you.� Also good to hear you have the engine back.� Your build is about to get very fun to watch.

I've been a little sidetracked with the ODie engine knock and the Fall Colors Tour.� Things have calmed down a bit, so I'll be digging in to Whitey again shortly.� I have to replace 2nd gear.� I'm going to try to do it without pulling the transmission.� Should be interesting.

Tim
2-1949 CJ3As
1-1946 CJ2A

Offline Ryan_M

  • Flatfender Master
  • *****
  • Posts: 1704
  • Karma: +0/-0
    • View Profile
Re: Hawk's 1949 CJ3A
« Reply #228 on: October 09, 2014, 07:15:39 PM »
Quote
I have to replace 2nd gear.� I'm going to try to do it without pulling the transmission

PLEASE document this process for us if you are able to.
Current:
'49 CJ3A
'51 CJ3A
'42 Willys MB-T
'47 Bantam T3-C
Previous:
'46 2A
'51 3A
'52 3A
'52 M38
'54 3B
East Coast Wi

Offline bretto

  • Willys Guru
  • ****
  • Posts: 486
  • Karma: +0/-0
  • OD 3A cousin
    • View Profile
Re: Hawk's 1949 CJ3A
« Reply #229 on: October 19, 2014, 10:16:42 AM »
Quote
without pulling the transmission.

I don't think this is possible.  Are you replacing it because your popping out of 2nd?  I just buttoned up that problem and it is a joy having it stay in gear.  I did just as you are thinking.  I replaced the 2nd gear additionally, I also shimmed the output shaft inward.  The synchro collar has really good engagement now.  But this was all done with the tranny out on the shop floor.  Let us know if and how you can tackle this without removal.  You may also want to look at your shift tower fork for wear.  If its worn enough, it won't push the collar back fully enough.

Brett Orem, UT� [size=14]PHOTO DIARY OF MY BUILD[/size][/URL]

Offline athawk11

  • SMF Administrator
  • Flatfender Master
  • *****
  • Posts: 2818
  • Karma: +0/-1
  • 1949 CJ3A
    • View Profile
Re: Hawk's 1949 CJ3A
« Reply #230 on: October 19, 2014, 11:36:31 AM »
Quote
PLEASE document this process for us if you are able to.
Quote
I don't think this is possible.�

Okay, so I did do this yesterday.� Keep in mind, this is on a rolling chassis, so I had access to both the top and rear of the transmission.� If you were going to try this with an assembled Willys, I think you could still do it, but it would be easier if you had a friend up top while you're down and under.� He would have to know exactly what you're trying to do.� Also, you would clearly need to drop the TC, and drive shafts.

After removing the TC, Drive Shafts, and Shift Tower, I tied the main shaft off so it would stay together.� I slipped in a shopping bag to catch the roller bearings.
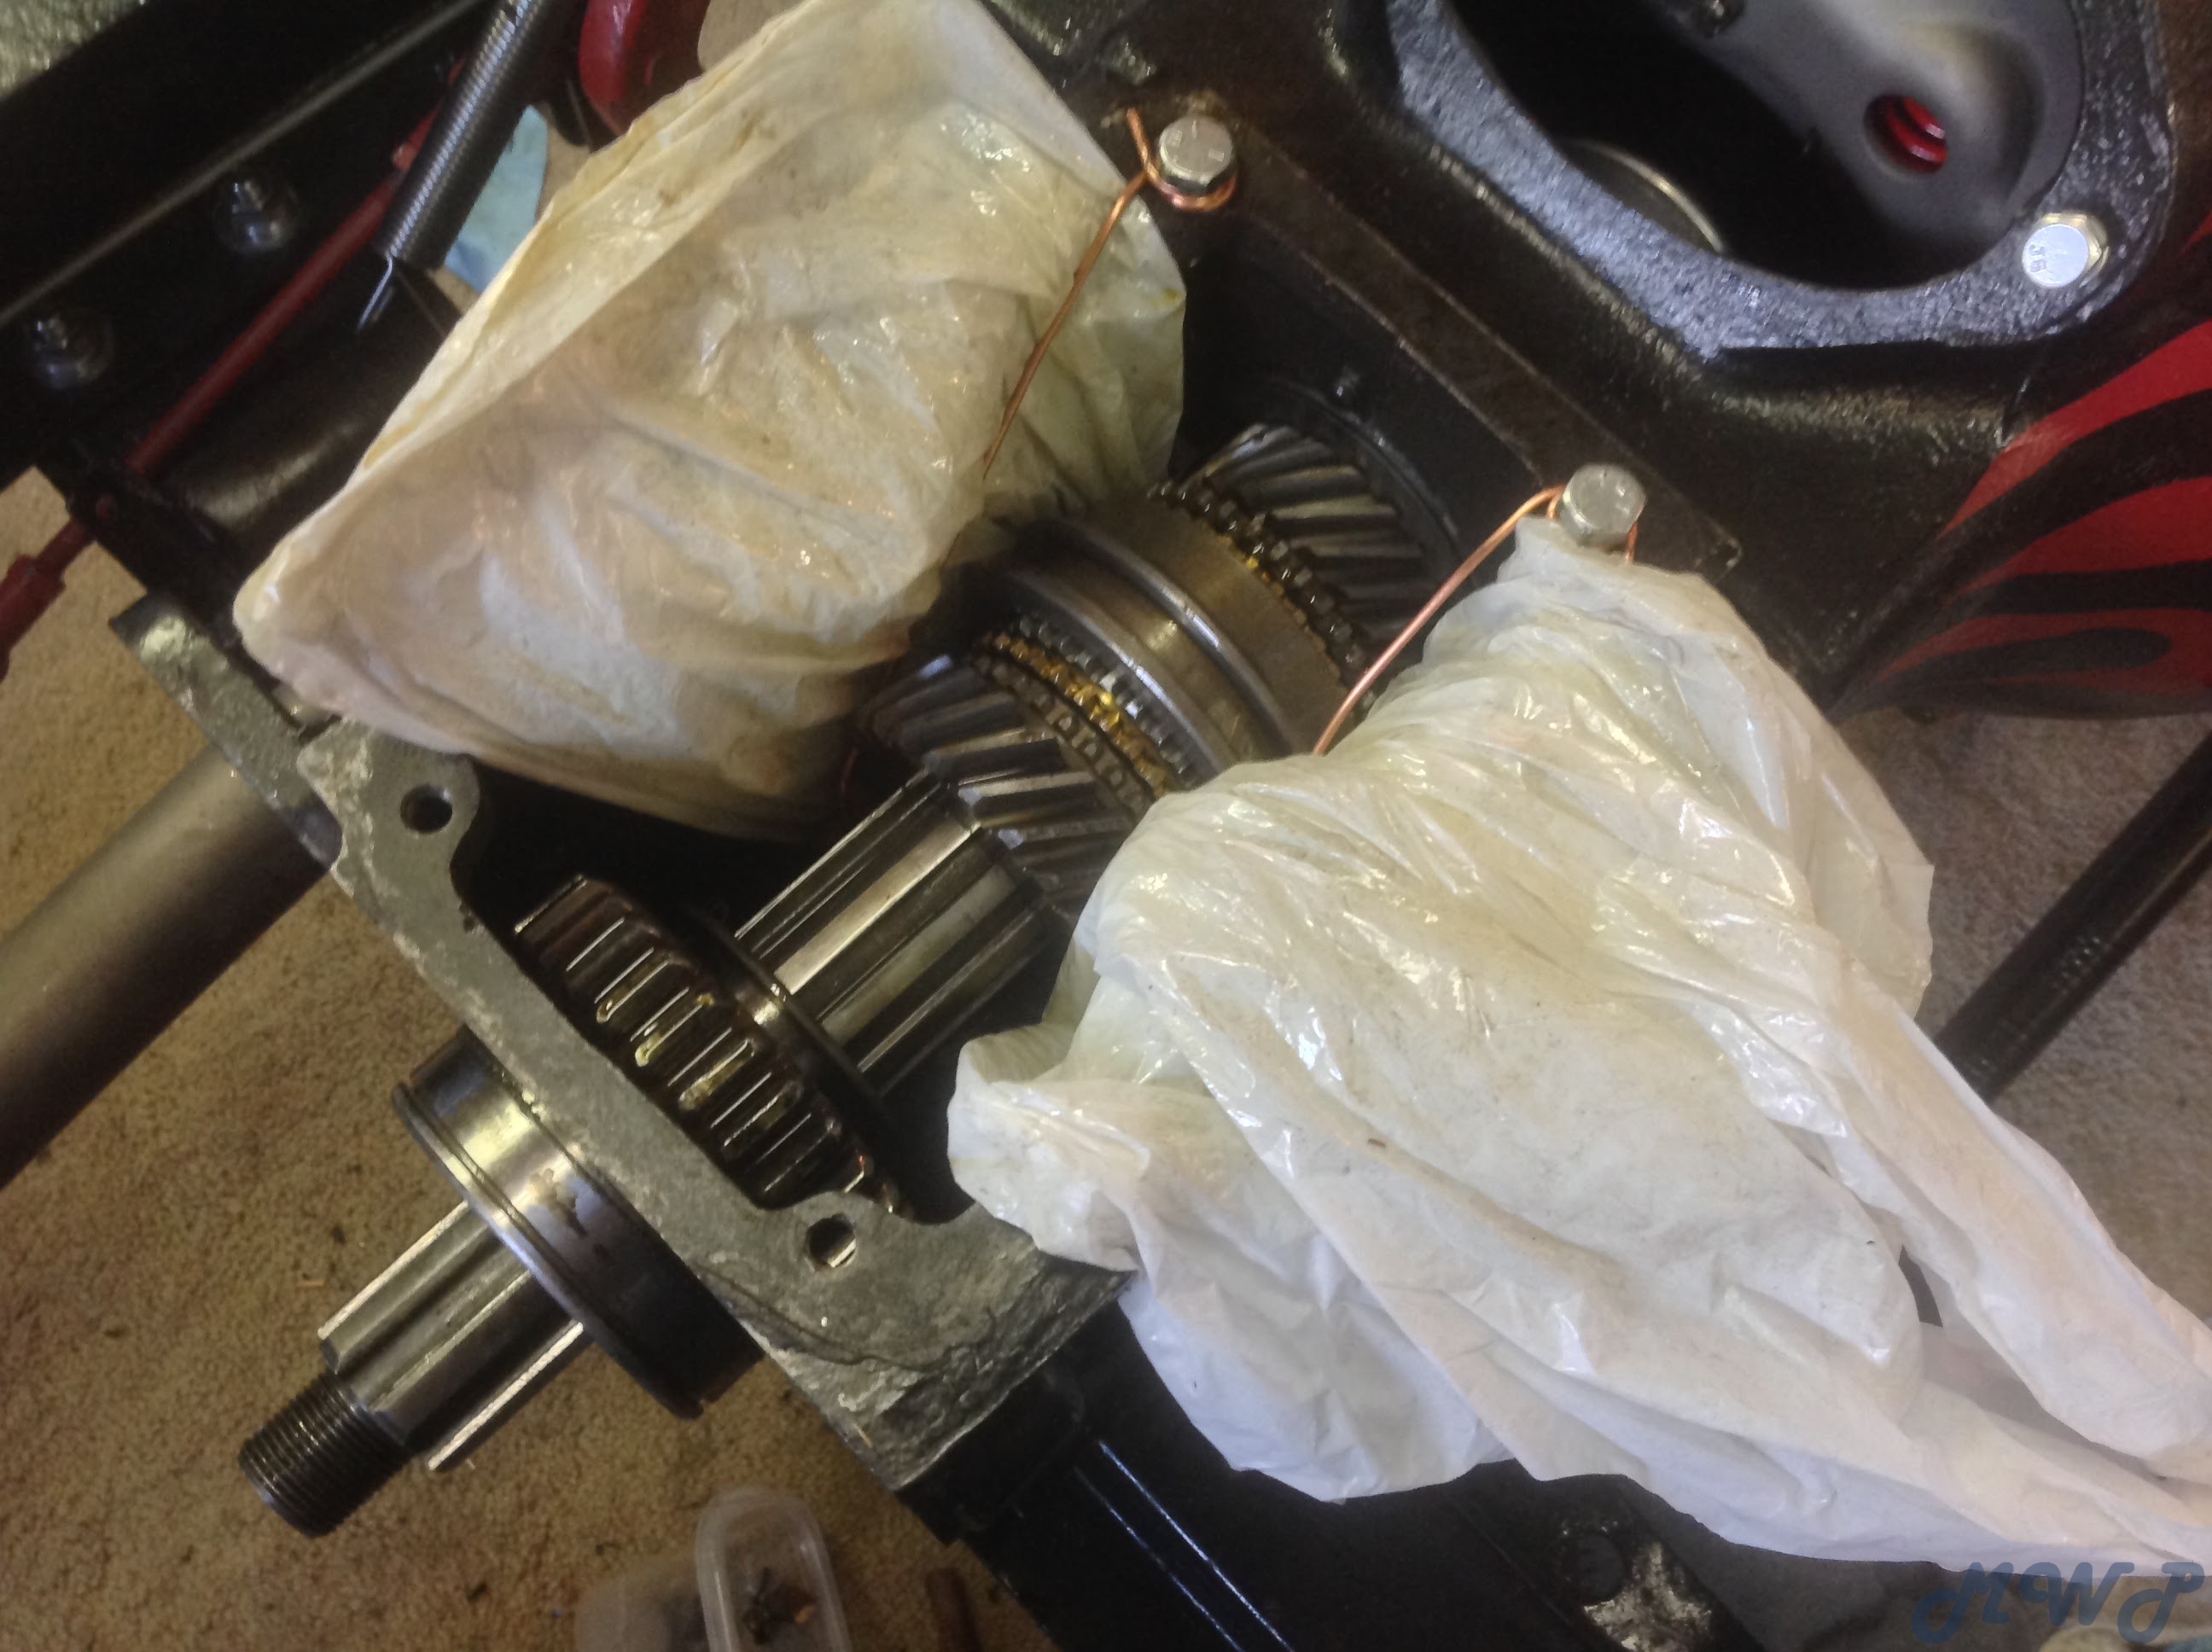


Initially, I was going to try this without even draining the transmission fluid, but you all know why this wouldn't work.� The minute you remove the lower bolts that hold the TC to the tranny, it will start to leak through the bolt holes.

Next, I remove my tie off and started to move the shaft out the back. While doing this, I slid the synchro hub as far forward as I could without having the three little dogs pop out.� Here is a bad photo of me pointing at the hub and how far forward I have to slide it...
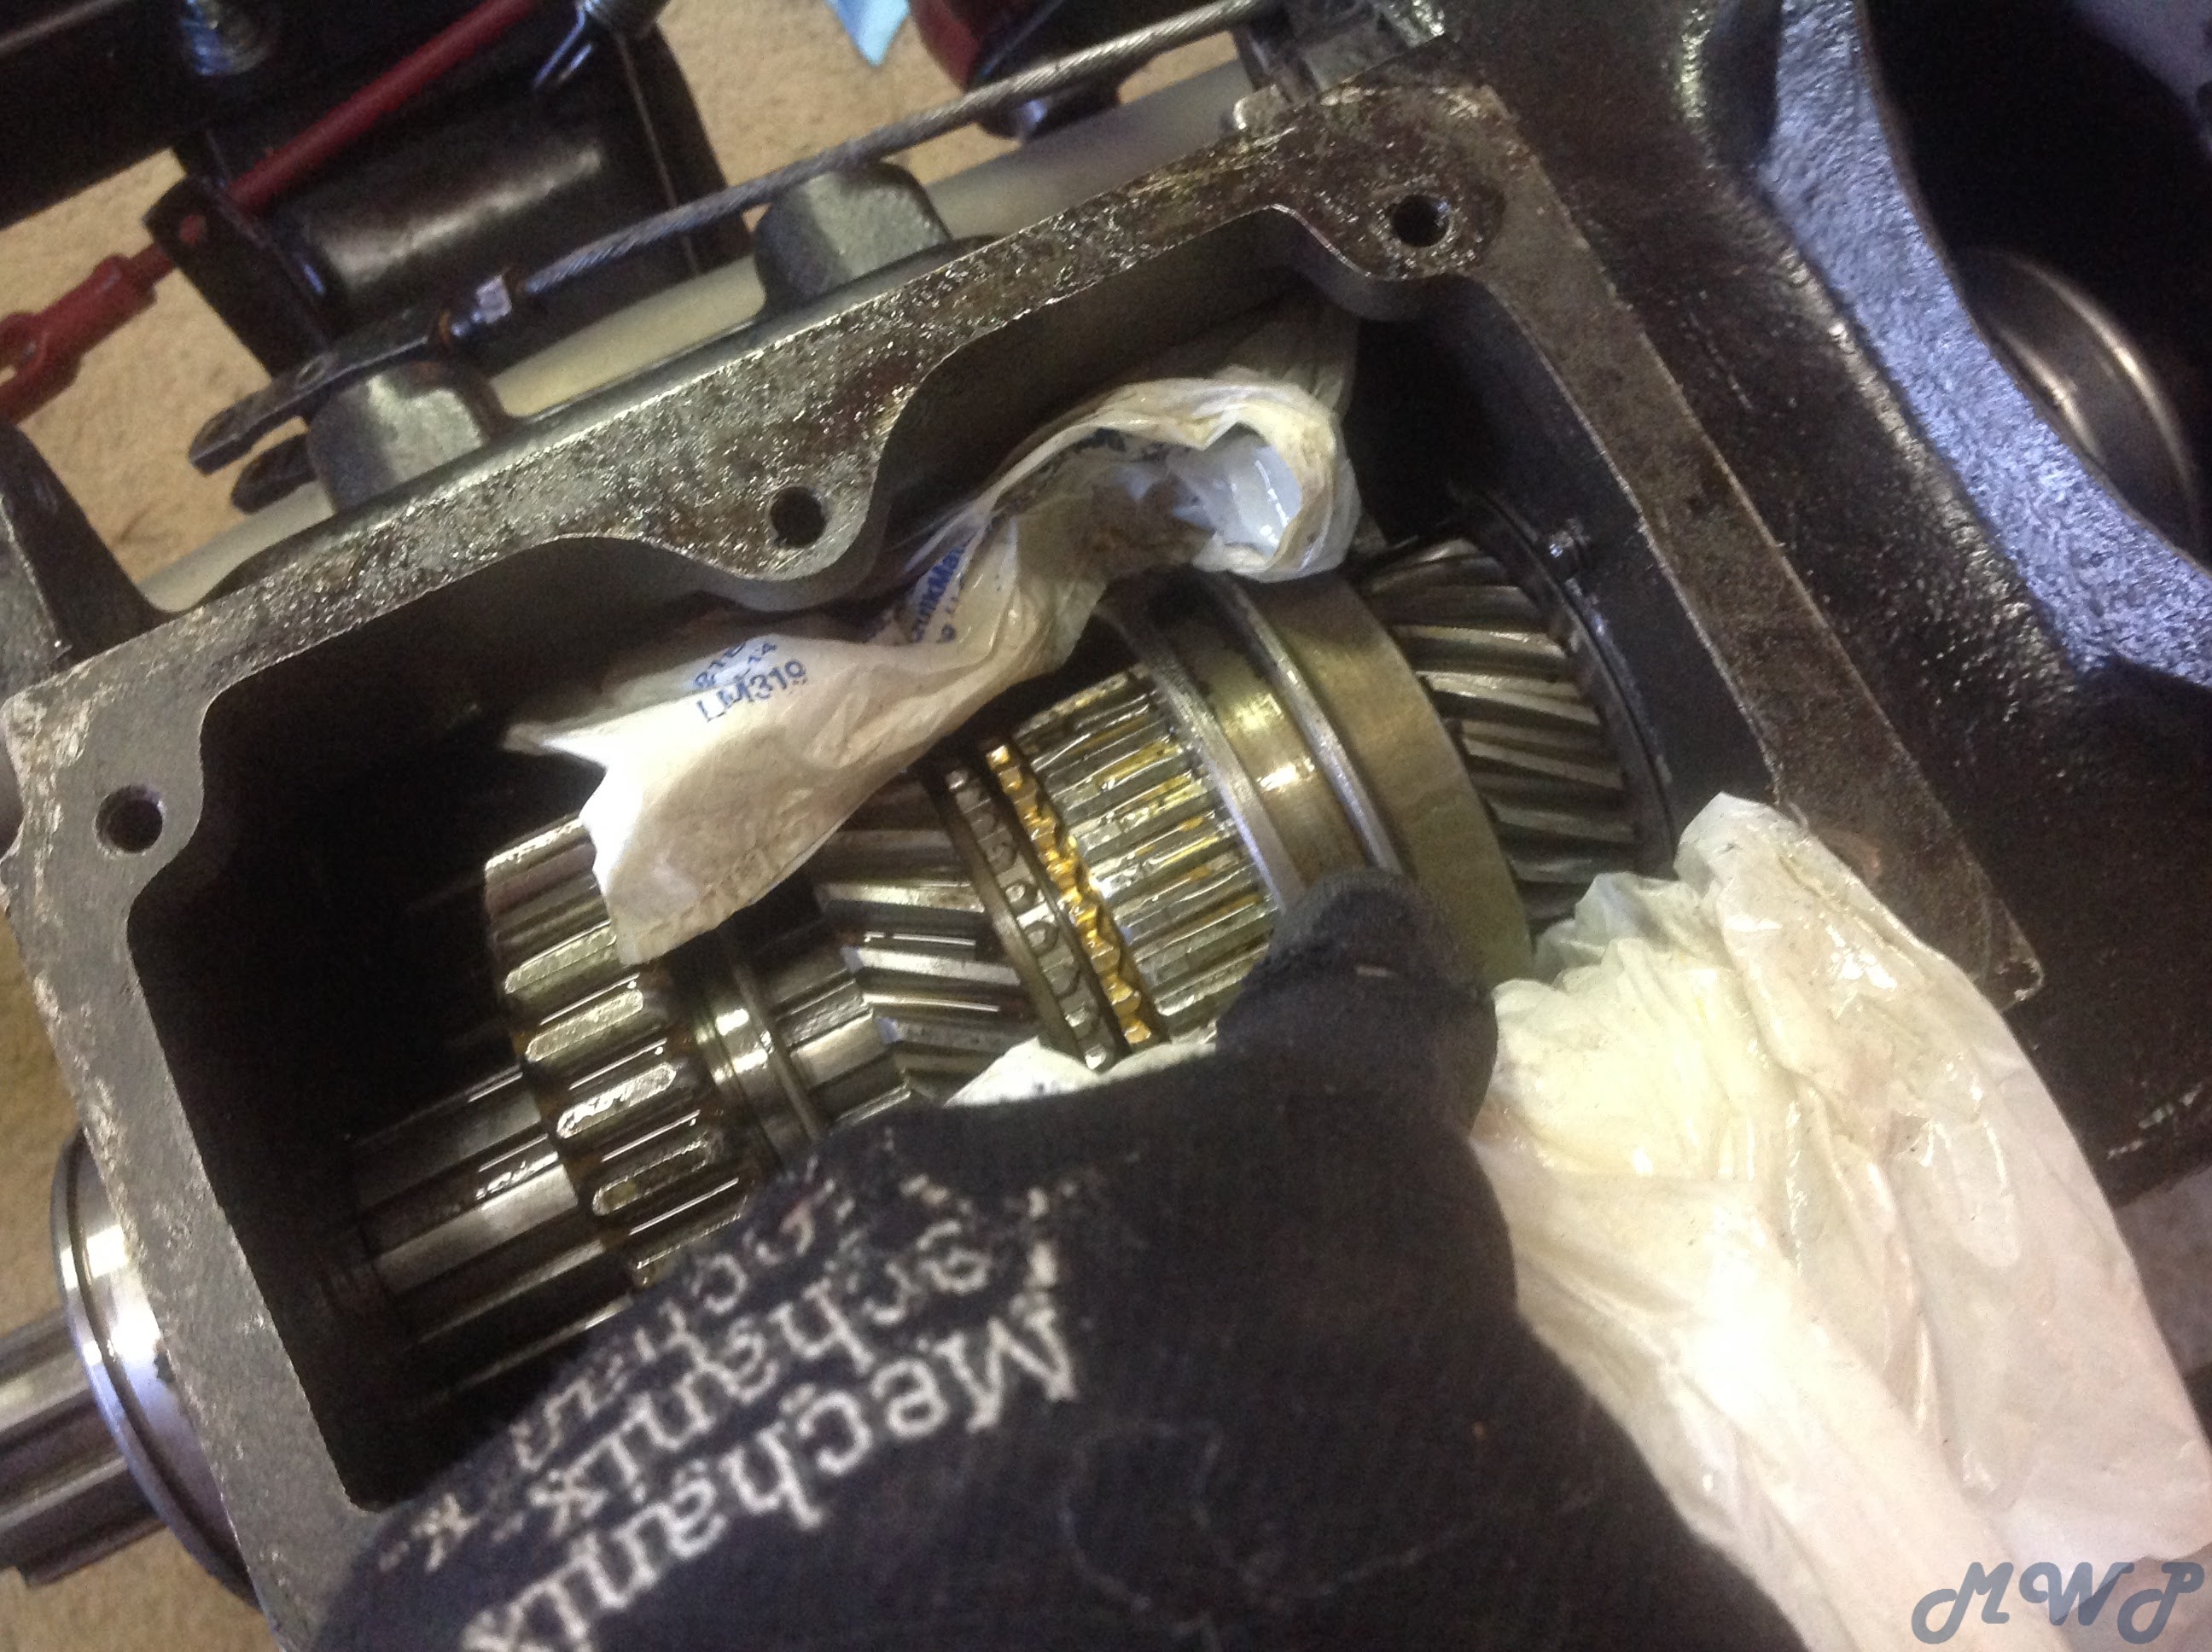


I then pulled and lifted the shaft up, over the cluster gear, and out the back.� Of course, the roller bearings all fell out, but my plastic bag caught them all...


I took the main shaft to the work bench and removed the ring at the front of the shaft.� I pulled the synchro hub off as an assembly, then slid off 2nd gear...


Old 2nd gear.� The gear itself looks okay, but the chevrons are chewed up pretty good...


New second gear� USA made from Walcks...


I slid on 2nd gear after coating it with some petroleum jelly.� I slippped the synchro hub assemble back on, then removed the rear bearing, plate and 1st gear.� It's easier to guide the shaft back in to the bearings without this stuff on the shaft.


I loaded the roller bearings using ample amounts of petroleum jelly...


Once again, I pulled the synchro hub assembly as far forward as I can without losing the 3 little dogs.� I slid the shaft in and over the cluster gear, then inserted the front of the shaft into the roller bearings.� While doing this, I carefully slid the hub rearward....


Once the shaft was in place, I slid on 1st gear, the plate and the bearing, then tied the shaft back to the front of the case so it wouldn't slip out.� Done.

Not a bad job.� I was able to complete the whole thing in a couple hours.� I haven't put the TC back on yet.� Unfortunately. I had other chores.

To Bretto,� Where did you add the shim?� I have no front back slop when I hold the rear bearing tight, but I'm still wondering if a shim will help me.

Tim


« Last Edit: November 05, 2017, 04:06:29 PM by athawk11 »
2-1949 CJ3As
1-1946 CJ2A

Offline Ryan_M

  • Flatfender Master
  • *****
  • Posts: 1704
  • Karma: +0/-0
    • View Profile
Re: Hawk's 1949 CJ3A
« Reply #231 on: October 19, 2014, 01:27:47 PM »
Bravo. Well done sir.

I hope I never have to do this but if I do your step-by-step guide makes it look way easier than it probably is. Nice job.
Current:
'49 CJ3A
'51 CJ3A
'42 Willys MB-T
'47 Bantam T3-C
Previous:
'46 2A
'51 3A
'52 3A
'52 M38
'54 3B
East Coast Wi

Offline bretto

  • Willys Guru
  • ****
  • Posts: 486
  • Karma: +0/-0
  • OD 3A cousin
    • View Profile
Re: Hawk's 1949 CJ3A
« Reply #232 on: October 19, 2014, 02:26:25 PM »
Great photo's  I was assuming everything else was going to be intact (t-case) when you were going to try this.  But yes for sure this can be done with the tcase off.
Great job.  Did you check the output shaft tolerance where it meets up with the input shaft?  I made sure mine was right up and close with .012 clearance.  With the new 2nd gear and that clearance shimmed up, I'm hoping to never have a #2 disengagement problem again or at least for a very long time.
Brett Orem, UT� [size=14]PHOTO DIARY OF MY BUILD[/size][/URL]

Offline 1955CJ-5

  • Flatfender Master
  • *****
  • Posts: 2360
  • Karma: +0/-1
  • It wasn't always green....
    • View Profile
Re: Hawk's 1949 CJ3A
« Reply #233 on: October 25, 2014, 02:14:03 PM »
Thanks for the write-up Tim.

I think my TC will be coming off sooner than later...I'm a little concerned about being crushed when i try to remove it...

Did you use a jack or just your left and right arms?

how much do you think it weighs?� All I remember from the first go-round was that it was unusually heavy for it's size!

And please let us know how the shimming goes...

Randy
« Last Edit: October 25, 2014, 02:18:23 PM by 1955CJ-5 »
1955 CJ-5, A friend for 58 years....1951 CJ-3A, a new addition. 1929 Model A Ford Closed Cab Pickup...

Offline bretto

  • Willys Guru
  • ****
  • Posts: 486
  • Karma: +0/-0
  • OD 3A cousin
    • View Profile
Re: Hawk's 1949 CJ3A
« Reply #234 on: October 26, 2014, 11:52:22 AM »
Sorry Tim, I overstepped on the posts, didn't see you asked me a question.  Probably a bit late by now.
You won't be able to check this spacing without the shaft being able to slip in the bearing.� I have an older, setup bearing that has been honed out to make it a slip fit.� Once the bearing is on along with the spacer and all is tight up against the case, the gap can then be measured from the rear of the output shaft.
I placed the shim between the stock spacer and the bearing.� This moves the output shaft into the input shaft but you don't want it in so much that it bottoms out.� The gray area is that I don't know the specific spec, or if it's published but have read it to be .010.� I assume that the stock spacer that is in there was made to fullfill this clearance but as stuff wears and cases stretch, this space will open up.
Brett
« Last Edit: October 26, 2014, 12:01:38 PM by bretto »
Brett Orem, UT� [size=14]PHOTO DIARY OF MY BUILD[/size][/URL]

Offline athawk11

  • SMF Administrator
  • Flatfender Master
  • *****
  • Posts: 2818
  • Karma: +0/-1
  • 1949 CJ3A
    • View Profile
Re: Hawk's 1949 CJ3A
« Reply #235 on: October 27, 2014, 10:25:00 AM »
Hi Randy.  The weight is manageable, but it is awkward.  Maybe 75- 100 lbs.  It is a little heavier when you choose not to drain it.   I did not use a Tranny Jack.   There is an advantage with no tub in the way.  Laying on your back would certainly add to the challenge.  I think I will invest in a jack for future projects.

Thanks Bretto.  I did stick the TC back on this weekend, so I guess I�m going to go for it.  Hopefully I�m not pulling it all apart again, but as you know, it starts getting pretty easy once you do it 3 or 4 times.

As mention, everything is back together.  I just need to reinstall my temp seating, then take it for a spin.  Should have another update very soon.  Once this issue is resolved, we should be back to sheet metal prep and paint.

Tim
2-1949 CJ3As
1-1946 CJ2A

Offline bretto

  • Willys Guru
  • ****
  • Posts: 486
  • Karma: +0/-0
  • OD 3A cousin
    • View Profile
Re: Hawk's 1949 CJ3A
« Reply #236 on: October 27, 2014, 12:11:35 PM »
Ya mine has been in and out more than I can remember now or more than it should of :-[
Hopefully it all works out for ya and it probably will.
Brett Orem, UT� [size=14]PHOTO DIARY OF MY BUILD[/size][/URL]

Offline 1955CJ-5

  • Flatfender Master
  • *****
  • Posts: 2360
  • Karma: +0/-1
  • It wasn't always green....
    • View Profile
Re: Hawk's 1949 CJ3A
« Reply #237 on: October 27, 2014, 09:57:00 PM »
When you know exactly which handful of wrenches to grab before starting a repair then you've done it too many times....

I'm not sure I can press that greasy 100lb casting, and then start a bolt with my third hand....

I'm going to try and make some sort of wooden cradle, and then use my floor jack...
« Last Edit: October 27, 2014, 09:58:07 PM by 1955CJ-5 »
1955 CJ-5, A friend for 58 years....1951 CJ-3A, a new addition. 1929 Model A Ford Closed Cab Pickup...

Offline athawk11

  • SMF Administrator
  • Flatfender Master
  • *****
  • Posts: 2818
  • Karma: +0/-1
  • 1949 CJ3A
    • View Profile
Re: Hawk's 1949 CJ3A
« Reply #238 on: October 27, 2014, 10:28:01 PM »
Quote
I'm going to try and make some sort of wooden cradle, and then use my floor jack...

Another good idea.
2-1949 CJ3As
1-1946 CJ2A

Offline macrisel

  • Flatfender Master
  • *****
  • Posts: 639
  • Karma: +0/-0
  • Always in the middle of a project
    • View Profile
Re: Hawk's 1949 CJ3A
« Reply #239 on: October 28, 2014, 03:59:02 PM »
Many times you can find a transmision cradle that bolts to your floor jack that works pretty well.� Here is one example..
http://www.northerntool.com/shop/tools/product_200332755_200332755?cm_mmc=Google-pla-_-Automotive-_-Jacks-_-144423&ci_src=17588969&ci_sku=144423&ci_src=17588969&ci_sku=144423&gclid=CJ3AjsCN0MECFYKVfgod4XgAWA

Having a trans jack that is able to tilt and swivel makes installation a snap.� Also, get two 3" bolts, cut the heads off and grind the ends square.� Thread them into the bell housing and use them as guide pins when installing the trasmission/transfer case.

On a side note, those transmission jacks work great to drop a Chevy gas tank to replace the fuel pump.. ;)