The CJ3A Page CJ3B.info

Show Posts

This section allows you to view all posts made by this member. Note that you can only see posts made in areas you currently have access to.


Messages - Kelley

Pages: [1] 2
1
Gearboxes and axles / Re: '53 CJ3B Dana 44 Rear Pinion Set Up
« on: July 09, 2024, 12:45:13 PM »
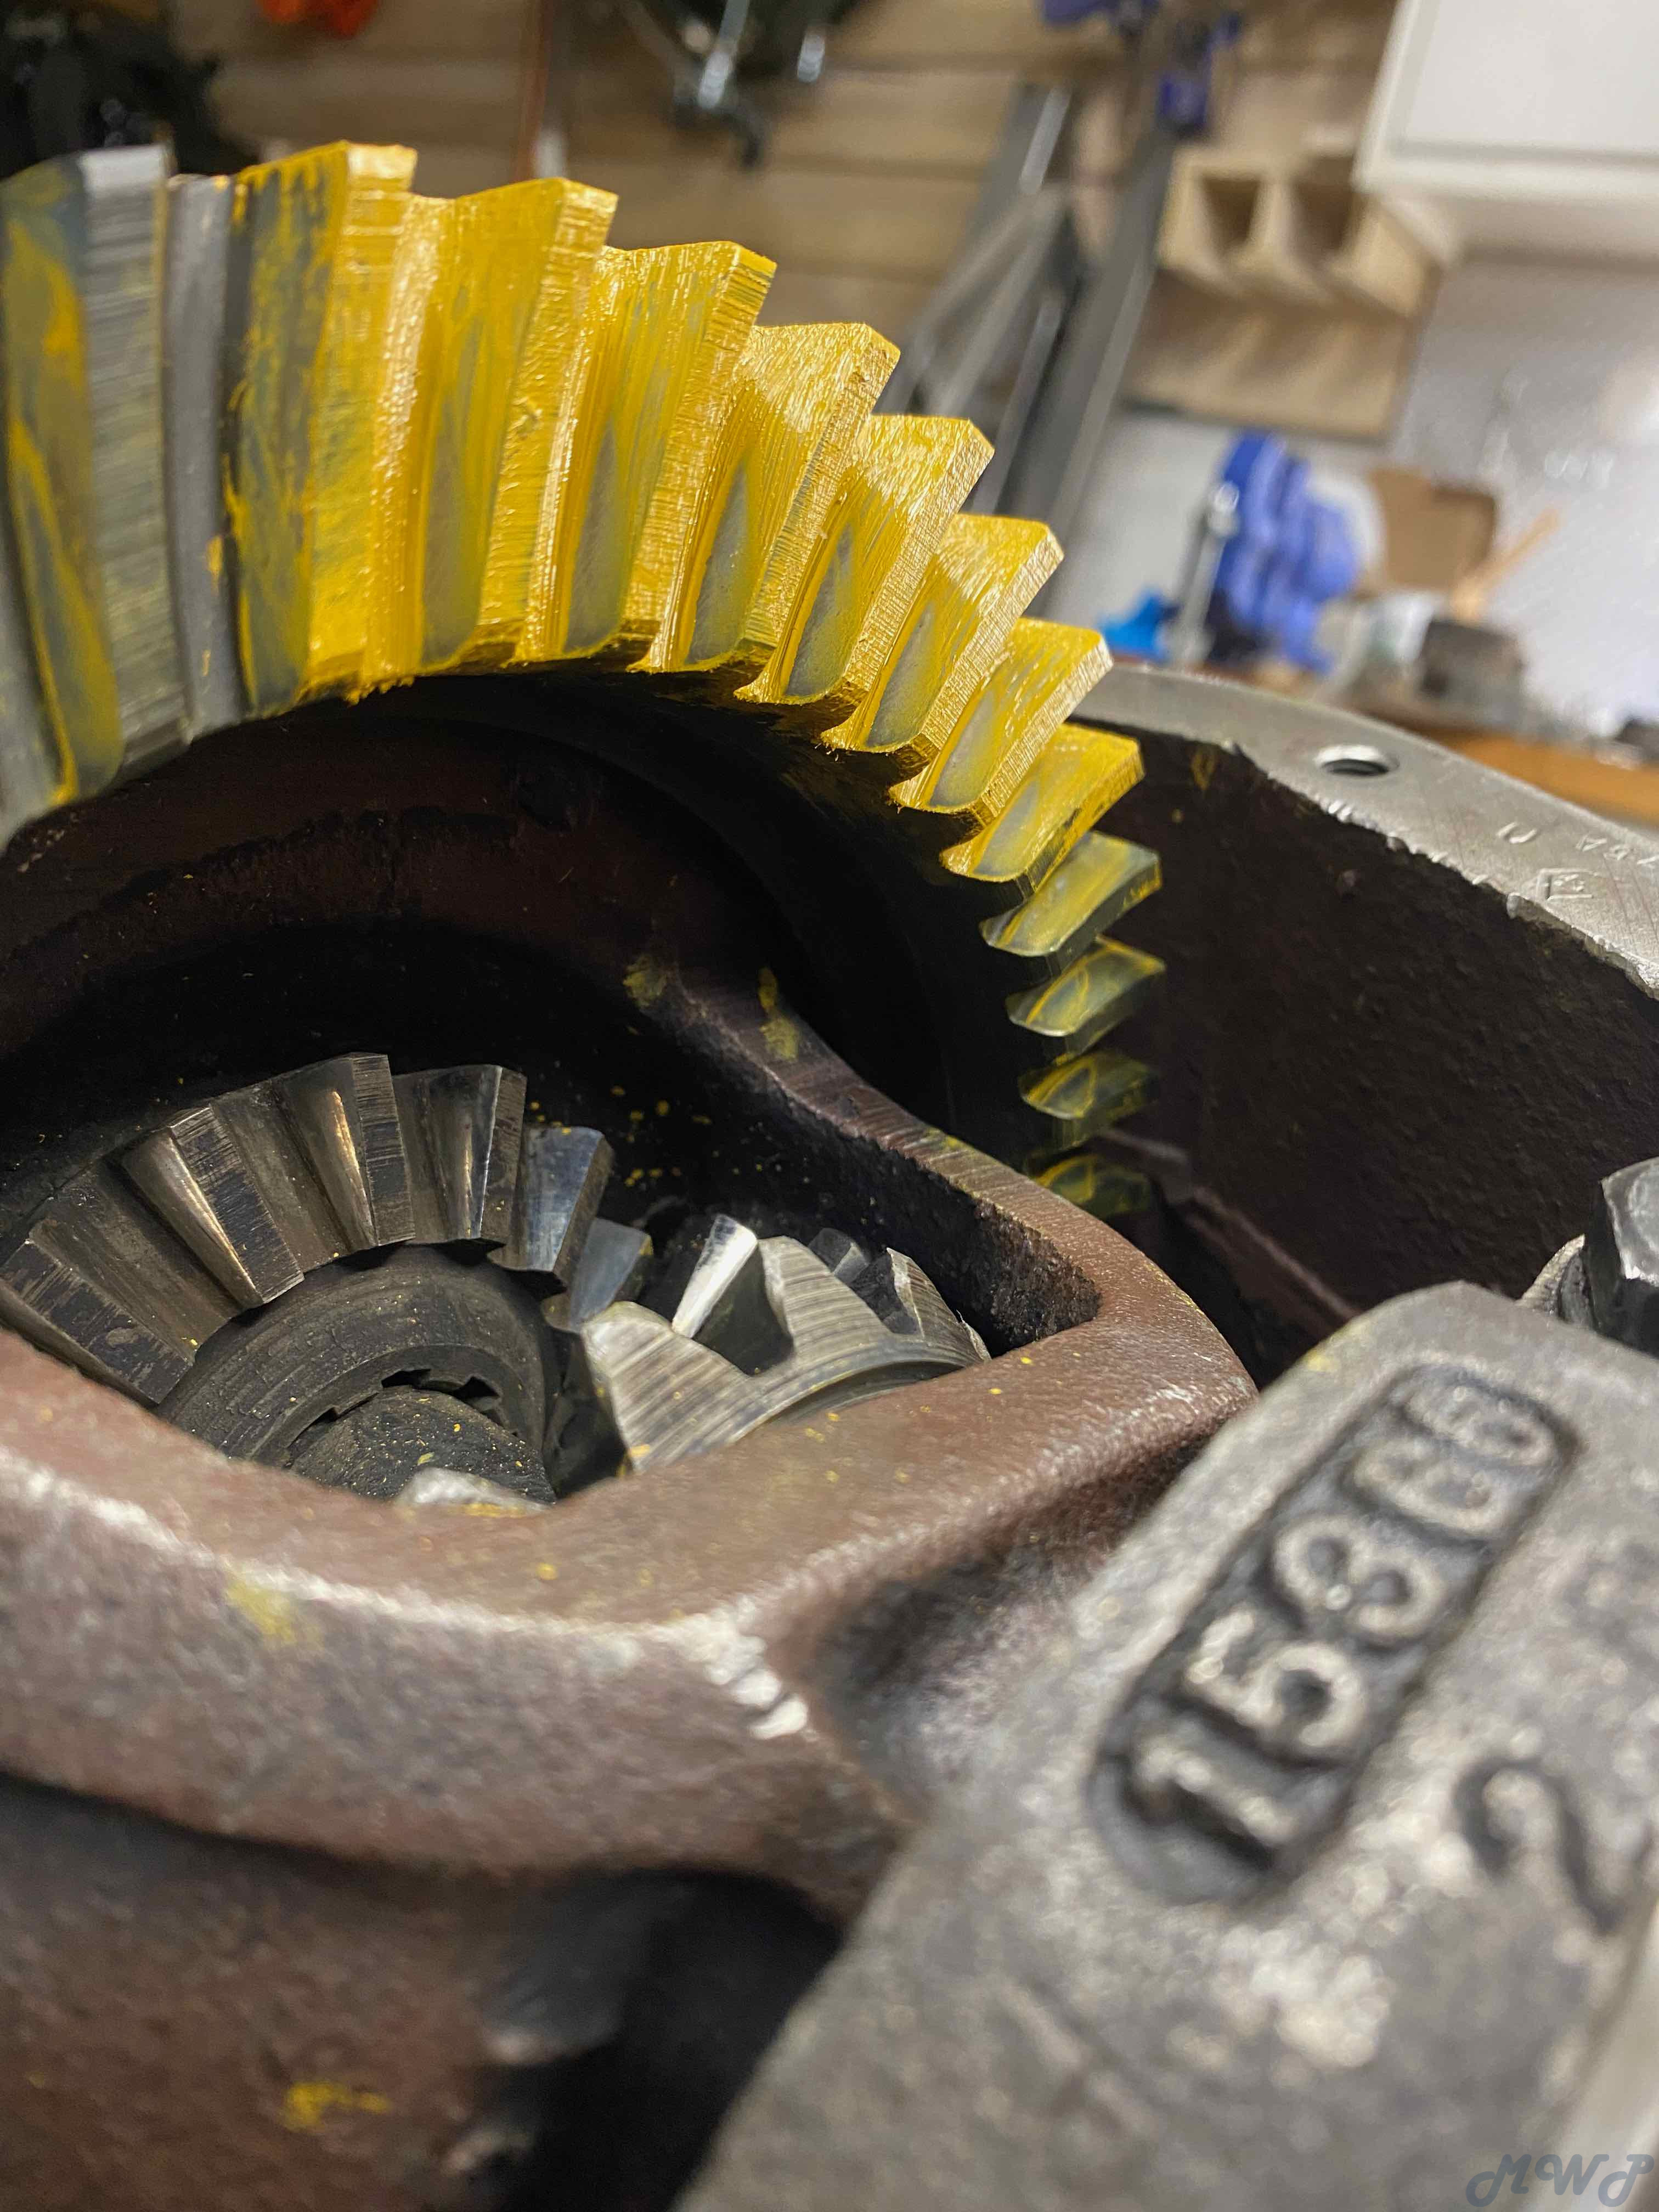
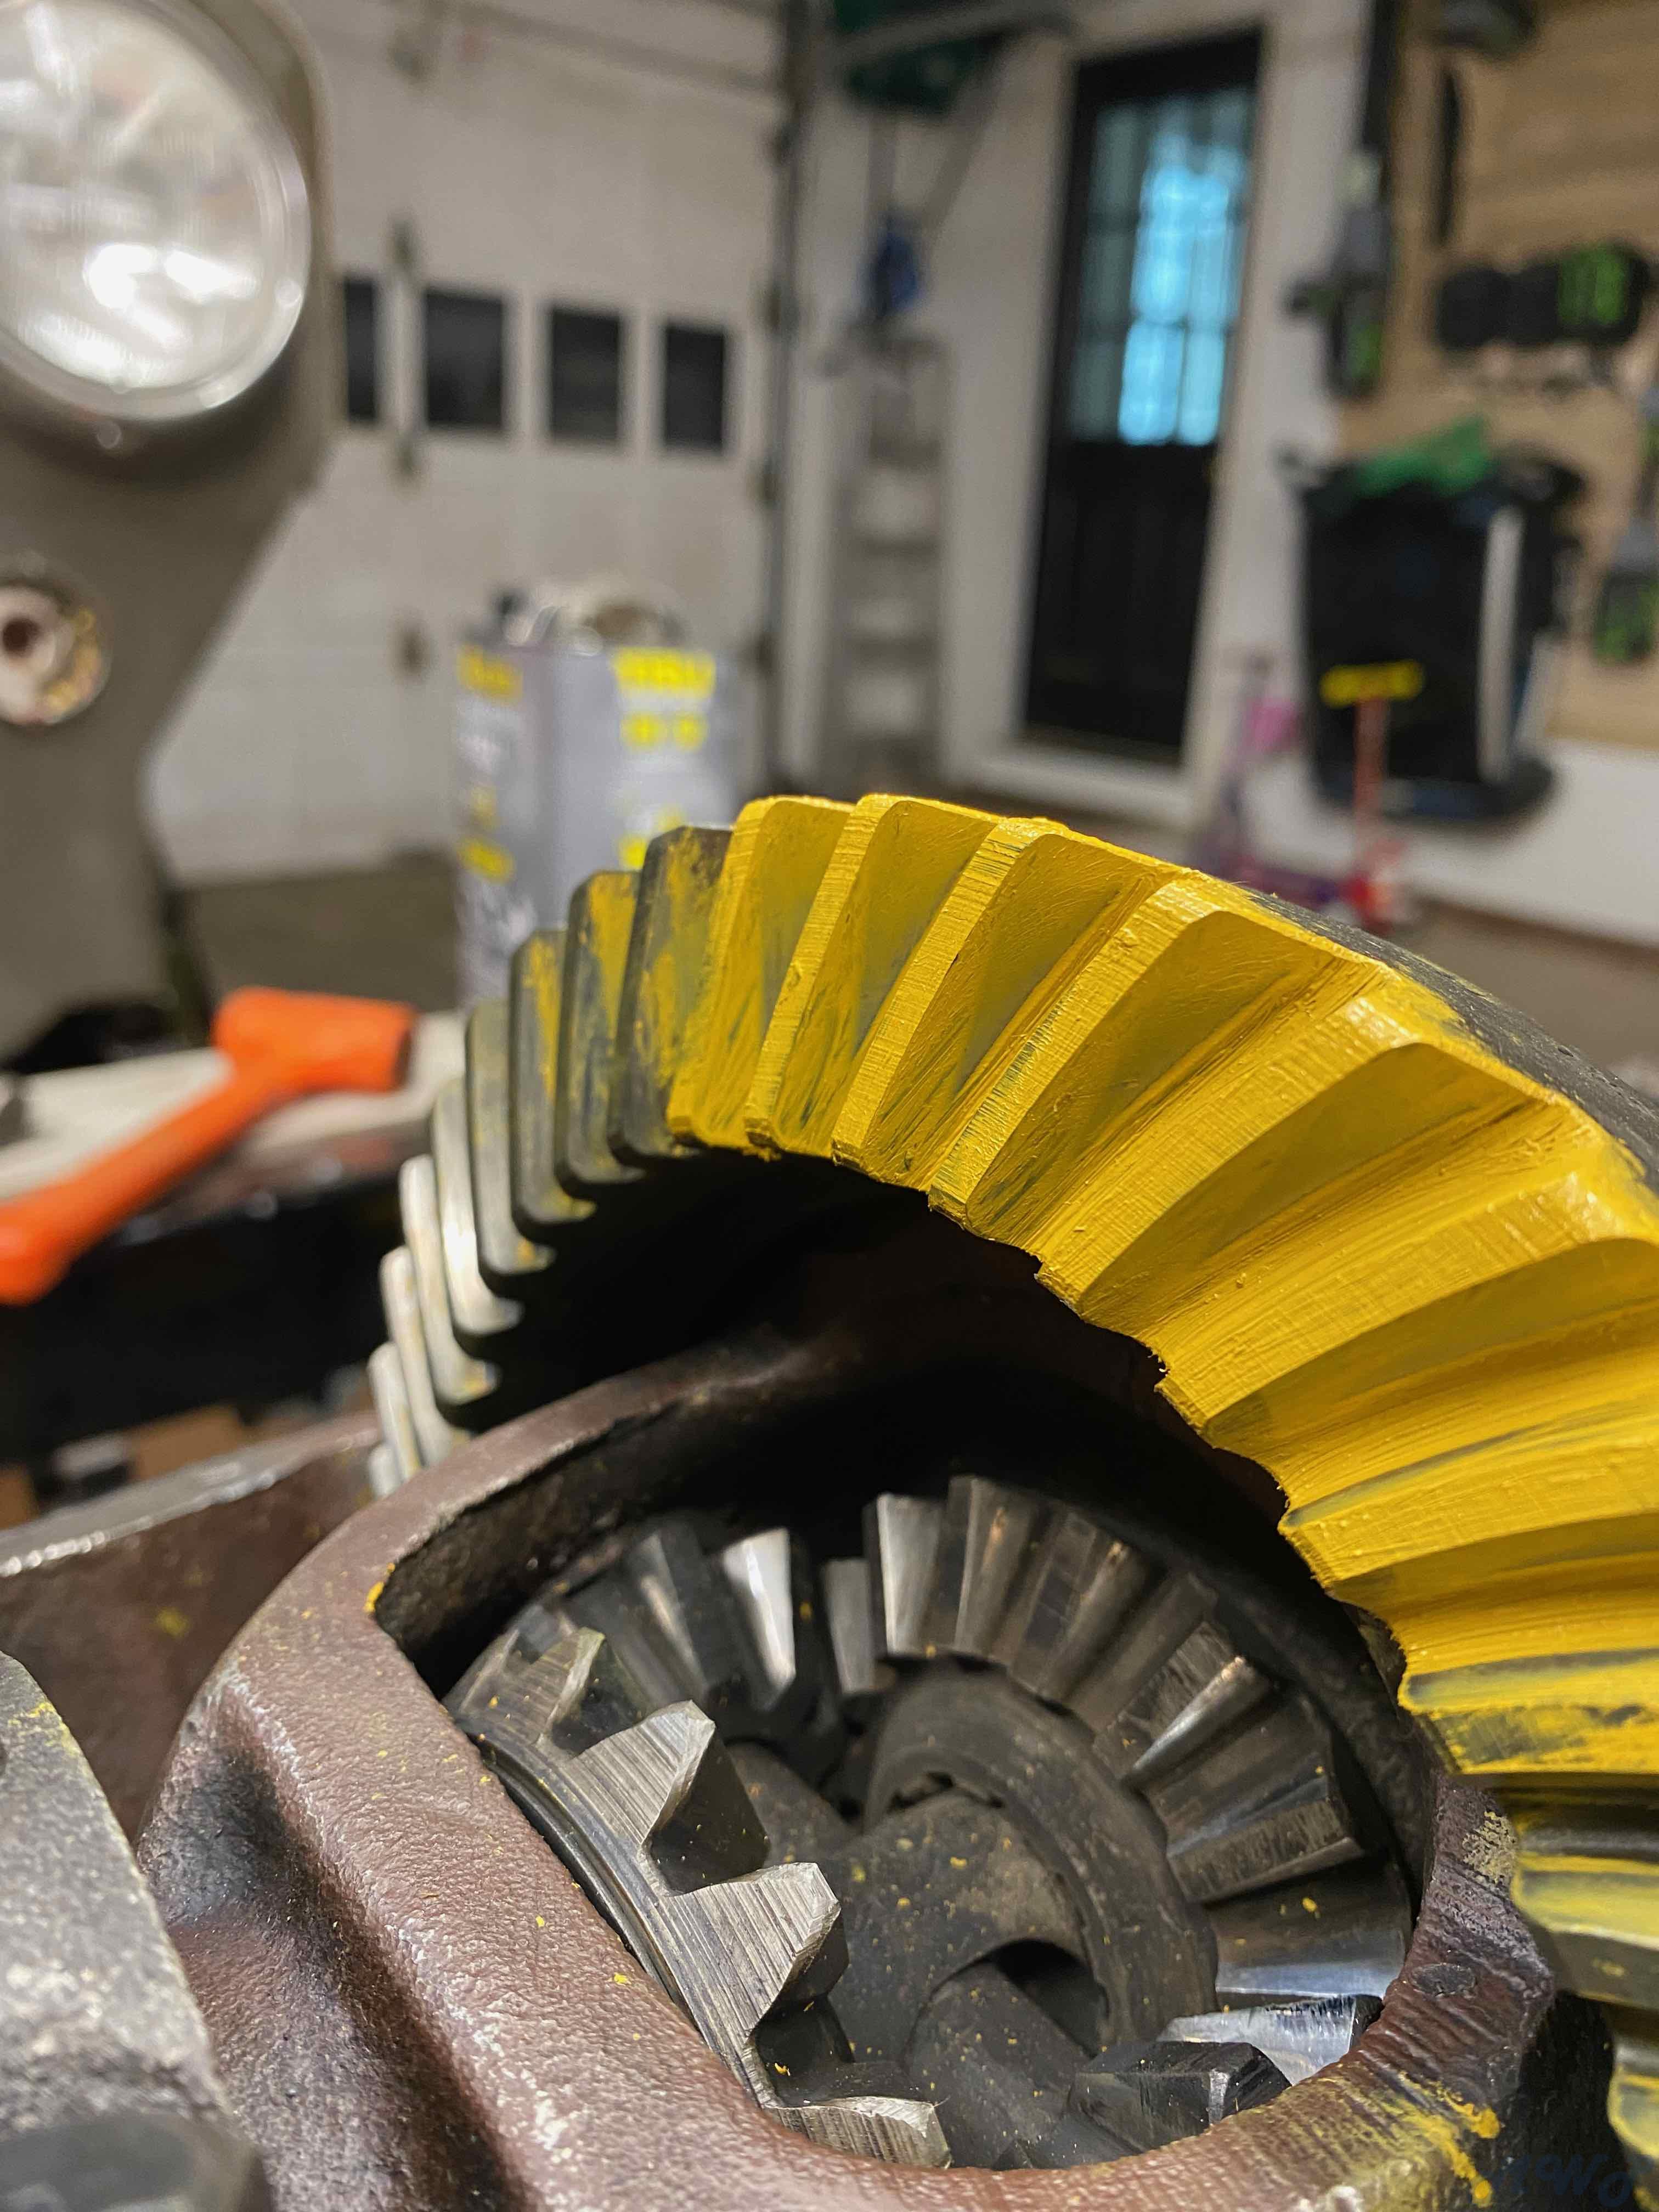
Wondering how we feel about this set up:

Ring gear backlash: 0.007"
Pinion preload: ~0.025 in-lbs
 
I had to raise the pinion in the case from .032 (original inner bearing shim pack) to .058.  Does anyone think it needs to come in further?

Drive Side:

Coast Side:


2
Gearboxes and axles / Re: '53 CJ3B Dana 44 Rear Pinion Set Up
« on: May 30, 2024, 03:29:20 PM »
Once again answered my own question:  No real difference in rotational torque when I tightened the nut to 200 ft-lb.  If it's shimmed right, it's shimmed right. 

Hopefully this helps someone.
-Kelley


3
Gearboxes and axles / Re: '53 CJ3B Dana 44 Rear Pinion Set Up
« on: May 30, 2024, 09:43:50 AM »
Ok,

Got another one: like many of you, I've been grateful for Brian Hainer (@metalshaper) for the information in his videos.  Following his D44 rebuild, he tightens the pinion nut to 100 ft-lbs in order to test bearing pre-load. 

Manual says to tighten to between 200 and 220. 

Presuming I should stick with the instructions from the manual.  thoughts?

-Kelley

4
Gearboxes and axles / Re: '53 CJ3B Dana 44 Rear Pinion Set Up
« on: May 26, 2024, 01:48:27 PM »
Nevermnd,

Found a combination that worked to get the preload to ~22 in-lb.  Within spec according to the manual (10-25)

Kelley

5
Gearboxes and axles / '53 CJ3B Dana 44 Rear Pinion Set Up
« on: May 20, 2024, 01:20:43 PM »
Can someone remind me what I'm shooting for:

Have a Dana 44 rear.  Completely disassembled and being overhauled.  Have new pinion bearings - 0.032" shim pack on the inner bearing and I'm setting the outer shim pack: the original shim pack was ~0.060".  I started out on the new bearings by reusing the original shim pack.  I was getting >40 inch pounds of rotational torque on the yoke (just the pinion, bearings, yoke, washer, and nut - no seals).  Had it in and out to adjust the shim pack a few times thinking that my goal is to achieve between 12 and 20 inch pounds. 

Shim pack --> Torque

0.076" --> almost nothing
0.068" --> 8 to 10 in-lb
0.064" --> 26 to 30 in-lb

is between 20 and 30 in-lb ok on new bearings? or too tight?

thanks
-Kelley


6
Ken,

Thank you - I went and searched tapatalk.  Found this: https://www.tapatalk.com/groups/cj3b_bulletin_board/springs-t2379.html which is the discussion to which I believe you were referring.  Very helpful.  I'm trying to call Walck's (busy signal) to find out whether their springs come with lubrication between the leaves.  Seems like they must? in which case I will just spray the outside with the same epoxy primer and black single stage topcoat I used on the frame. 

-Kelley

7
Rus -

Thank you !

Kelley

8
Chassis, brakes and suspension. / Painting new set of Walck's springs
« on: August 24, 2022, 11:56:14 AM »
All,

I'm planning on receiving a new set of springs from Walck's for my '53 3B.  Seems like they will need some fresh paint and I wonder if it makes sense to disassemble the leaves and paint them separately?  Wondering what others have done on new spring packs.  Ideally I'd like to get some graphite paint or lubricant in between the leaves.

-Kelley

9
Gearboxes and axles / Re: D18 shift fork orientation
« on: July 03, 2022, 09:34:11 AM »
Thanks both -

It really does only go together one way and that becomes obvious as you proceed. 

-Kelley

10
Gearboxes and axles / D18 shift fork orientation
« on: June 26, 2022, 10:03:42 AM »
Finally beginning the assembly process on a D18 rebuild. 

All the guides out there have you orient the high/low shift fork so that the lock screw faces closer wall of the case (near the drain plug).  (e.g. Rick Stivers')

Am I crazy or does the exploded view on the part's list drawing show the opposite?  I trust the rebuild guides out there.  Just wondering if I'm interpreting this wrong.

11
Your CJ-3B Project / Re: 1953 3B Build Thread, 453GB2 27642
« on: February 26, 2022, 02:26:33 PM »
Mike - thanks. 

progress has slowed considerably with the arrival of our son (2nd under 3 now) last summer.  Looking forward to getting back to it as soon as I can. 

-Kelley

12
Chassis, brakes and suspension. / Re: CJ3B Frame Mounts for Tub
« on: October 18, 2021, 09:38:26 PM »
Rus,

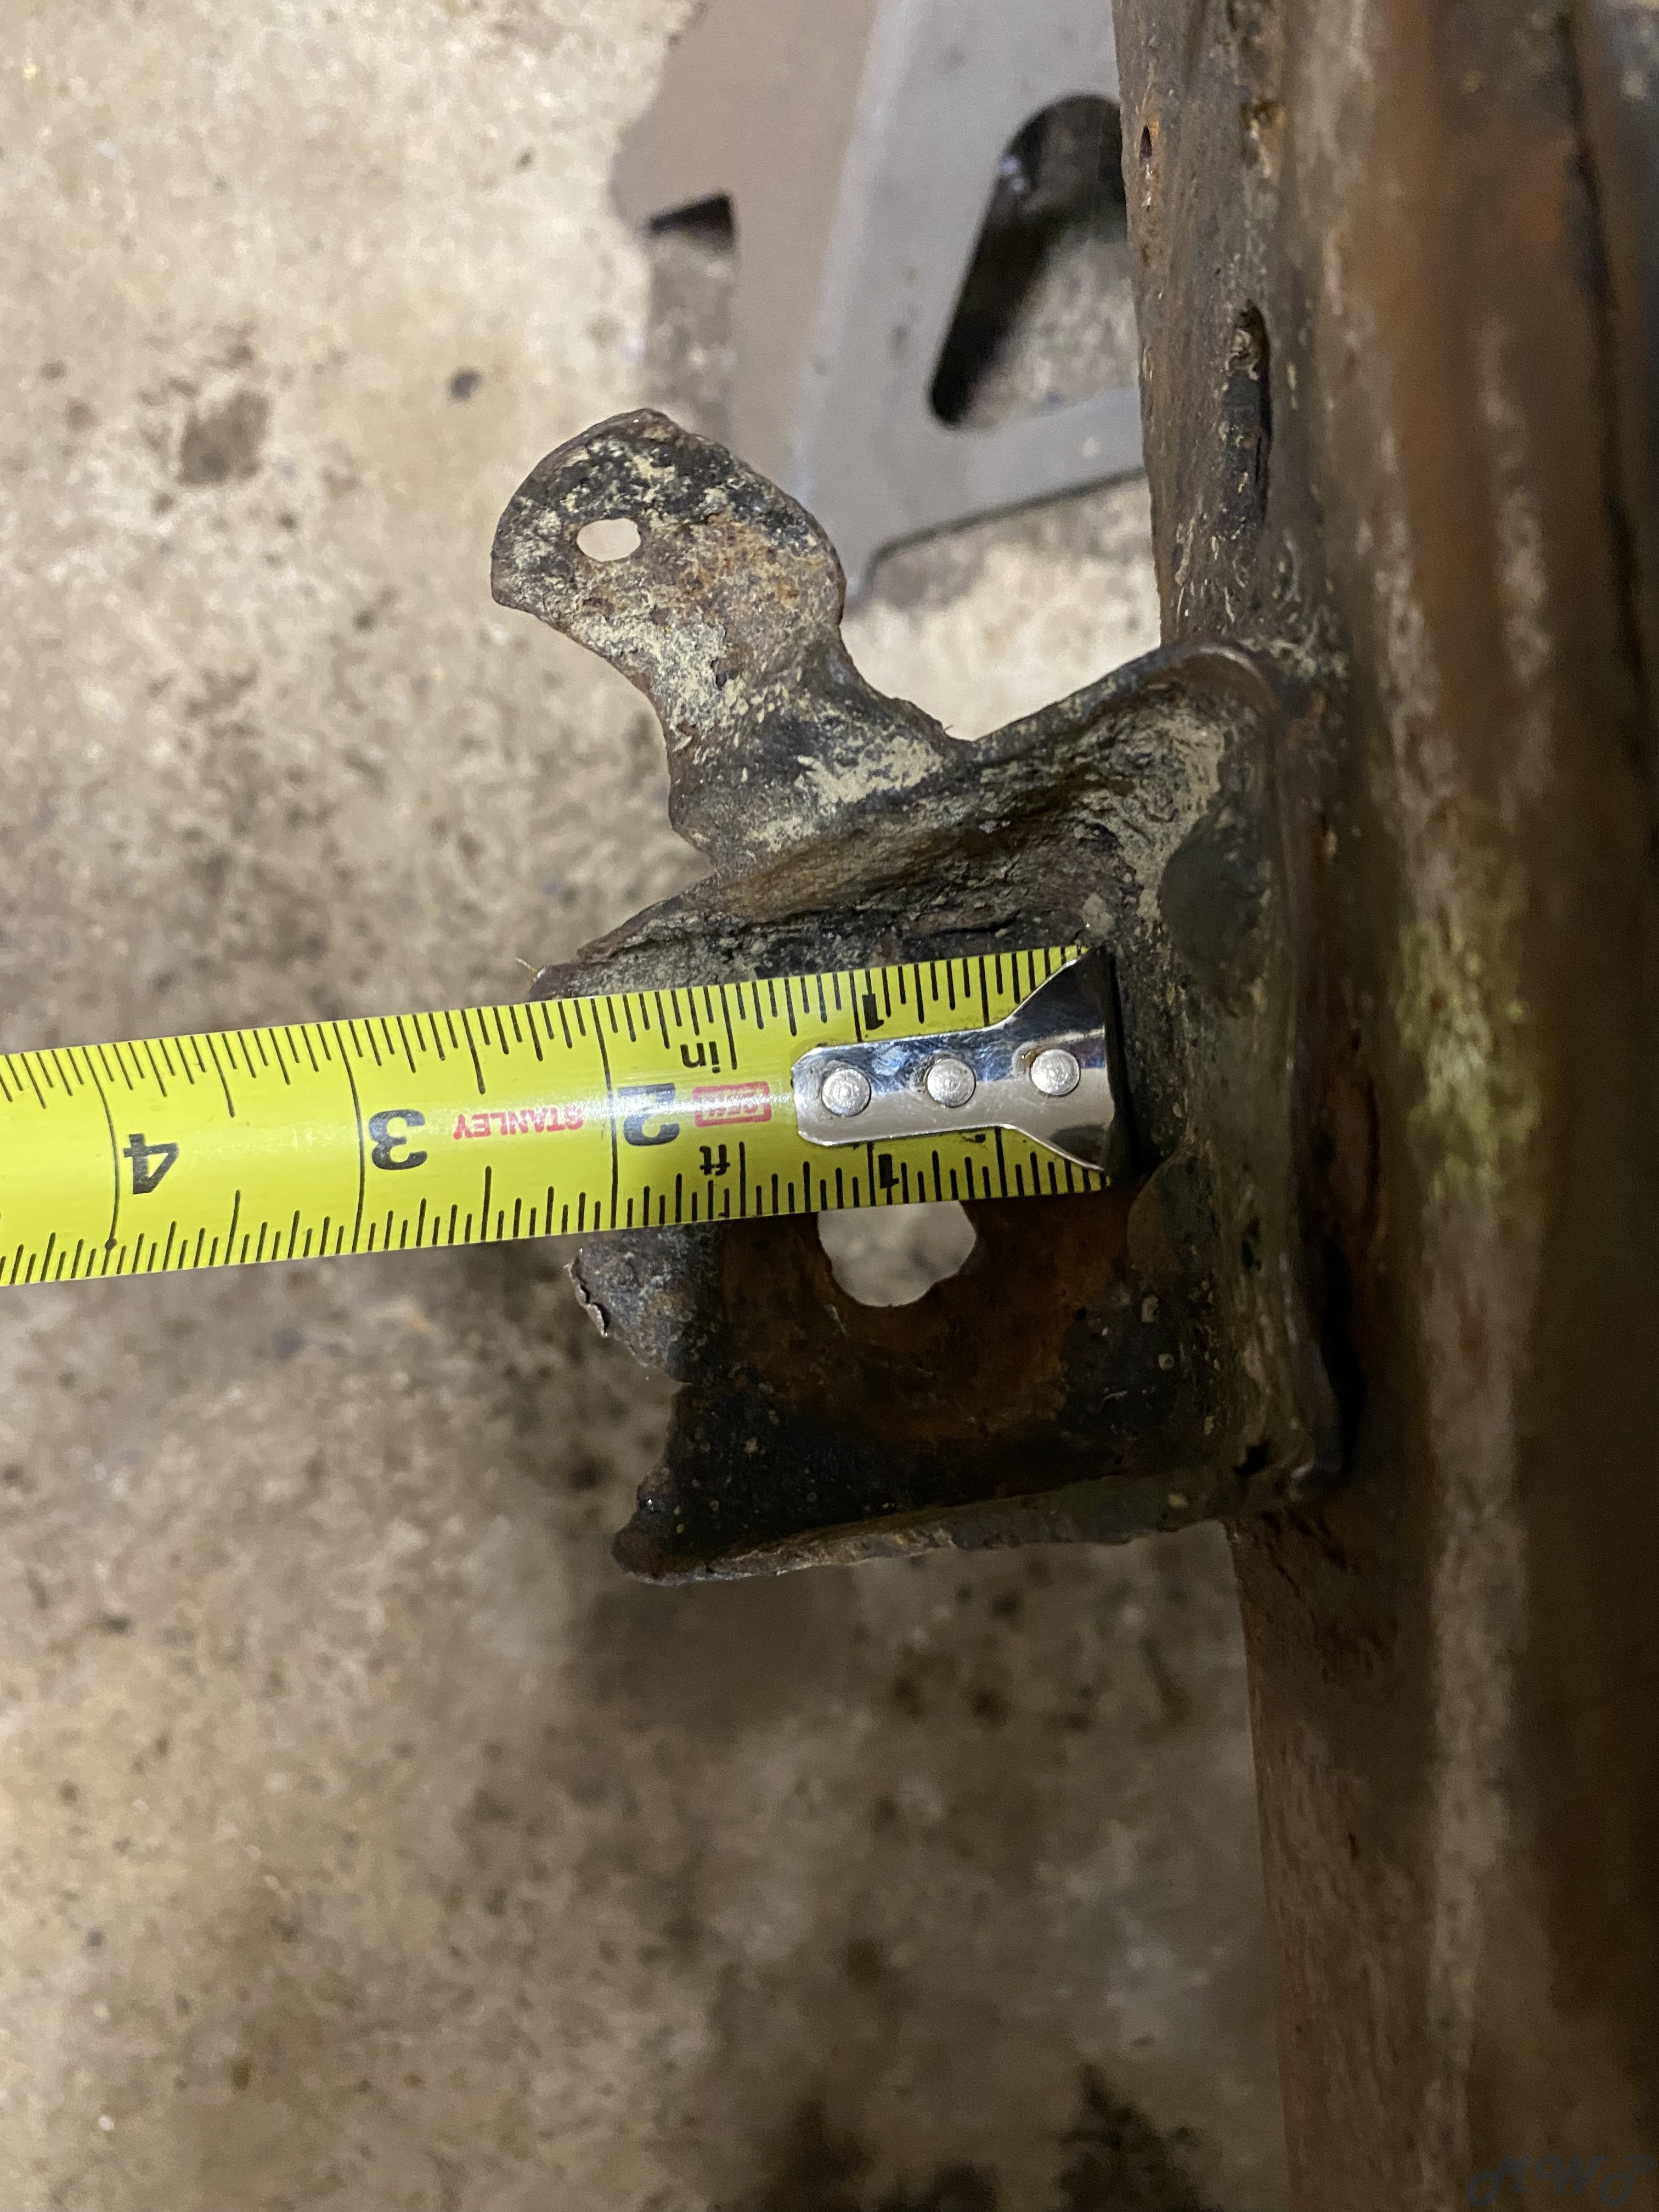
Thanks so much for making a few measurements.  What a helpful response.  I was worried this might be a case of crummy reproduction parts. I see the same measurements on my frame - they must be original. The second picture is the outrigger just aft of the first.  I'll look around for some NOS parts and Oldtime, I may reach out if I can't find any!


13
Chassis, brakes and suspension. / CJ3B Frame Mounts for Tub
« on: October 16, 2021, 10:23:44 PM »
I picked up some replacement body mount out riggers (p/n 645072) for the frame of my '53 3B from Walck's.  Am I crazy or is this wrong? The bolt holes seem pretty far off.  I can't believe that the wear and tear on the original ones would have distorted them this much.

Any thoughts?


14
Your CJ-3B Project / Re: 1953 3B Build Thread, 453GB2 27642
« on: October 09, 2021, 09:56:40 AM »
Hey does anyone know a good sandblaster in eastern Massachusetts ?

15
Your CJ-3B Project / Re: 1953 3B Build Thread, 453GB2 27642
« on: August 10, 2021, 04:01:34 PM »
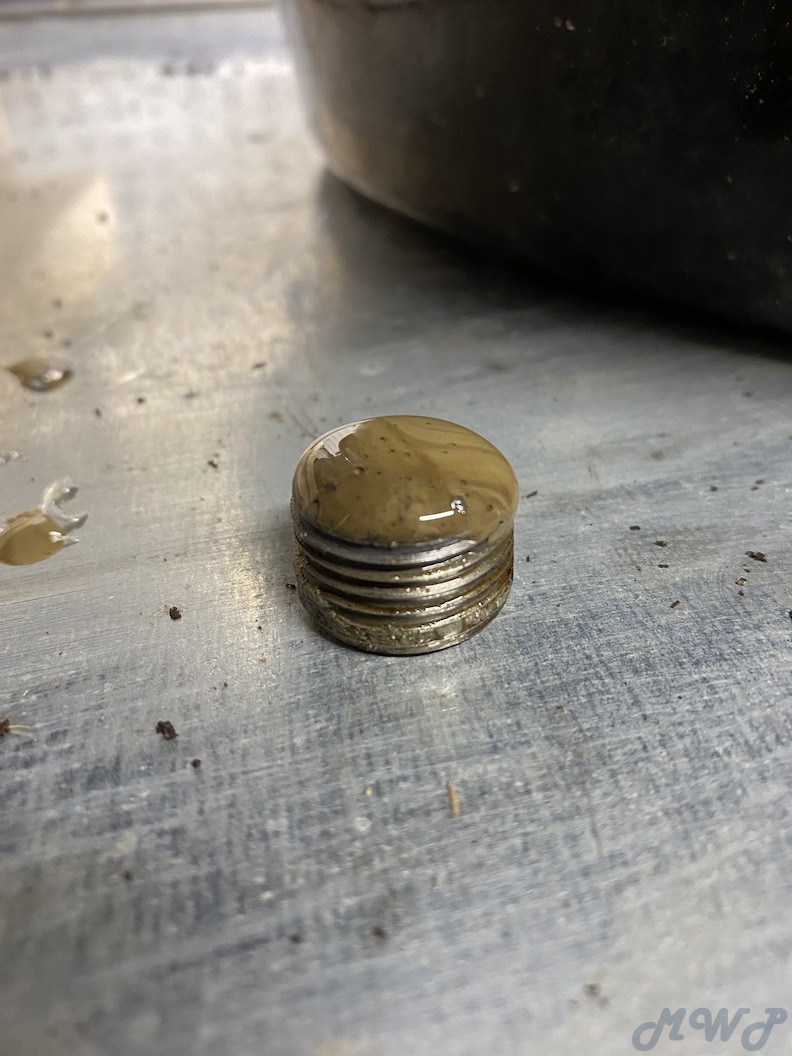
Here are some photos from disassembling the T90.  I was eager to know what condition the gears were going to be in - creamy looking oil when I began draining the case was not a good sign:


My first real victory over parts that were rusted together was with the pivot pin for the transfer case shift levers.  It took really the better part of a week of soaking in PB Blaster and tapping on it each night before it started to budge.  What a feeling of accomplishment to remove the part without breaking anything.  Patience really is key at this stage.  With the shift levers off, I separated the T90 from the D18:


I followed Rick Stiver's guide to proceed with disassembly.  After a run through the parts washer, I bagged, labeled, and organized everything for inspection.


Here are some shots of the case.  One thing I'm interested in knowing from everyone is your opinion of the surfaces where the thrust washers sit. I understand they should not be gouged from a rotating thrust washer.  I see some scratches on this one where the cluster gear rides but I wonder if they don't rise to the level of needing any real repair (I hope the case doesn't need to be replaced):


Next up, the transfer case:


Pages: [1] 2