The CJ3A Page CJ3B.info

Post reply

Warning: this topic has not been posted in for at least 120 days.
Unless you're sure you want to reply, please consider starting a new topic.

Note: this post will not display until it's been approved by a moderator.

Name:
Email:
Subject:
Message icon:

Verification:
Type the letters shown in the picture
Listen to the letters / Request another image

Type the letters shown in the picture:
Write the word between words Jeep from this JeepWILLYSJeep?:
How many slot has a GPW grill?  7 - 9 - 11:

shortcuts: hit alt+s to submit/post or alt+p to preview


Topic Summary

Posted by: SteveW
« on: July 05, 2017, 04:14:42 PM »

That would be nice to see. I would recommend when you do it start your own post as some differences would be helpful to others and what works for me may not work for you so comparisons won't get bogged in a multi page threads which tend to not get looked at. Here is what I did for my jack

http://www.cj3apage.com/cgi-bin/3Ayabb26/YaBB.pl?num=1434844398
Posted by: Mark W.
« on: July 05, 2017, 02:48:13 PM »

I'm going with a Shovel and a Pulaski Axe as it has both the Axe edge and the digging blade of a Mattock. I'll also add in a large Bow saw. And of course a High lift Jack. 
Posted by: SteveW
« on: June 17, 2017, 03:51:46 PM »

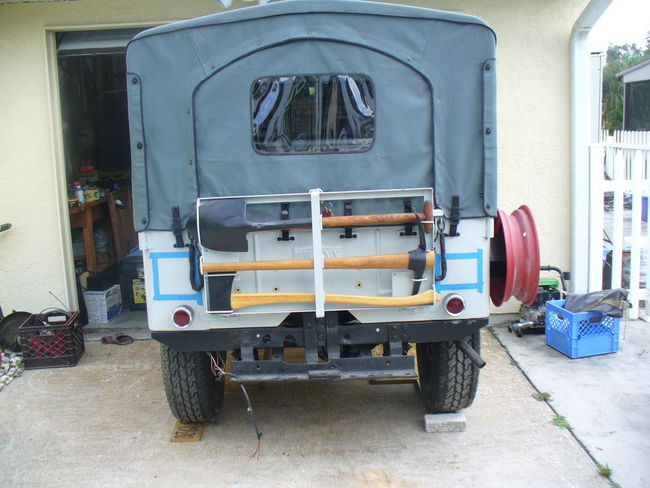
Working on fixing my door frames so I thought I would install it and see if it was a problem with the top.


Looks like I made it to custom fit. Didn't but I am sticking to it
Posted by: SteveW
« on: October 22, 2015, 04:40:10 PM »

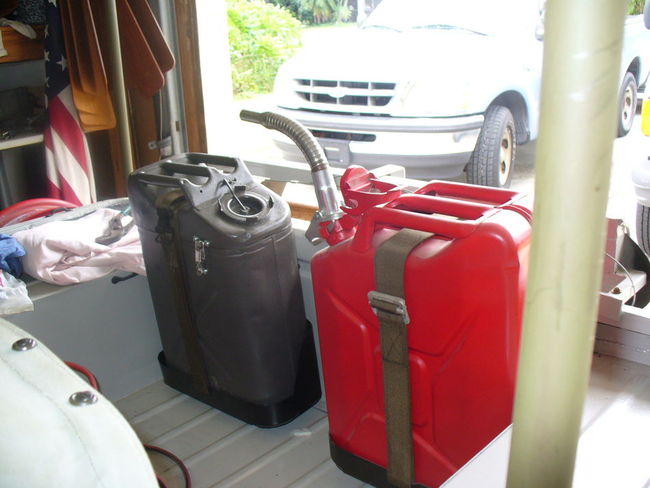
Here is the rack and my can set up. Getting a little antsy now that I have gotten title taken care of and putting stuff back together in engine that I had redone. We have had a long hot rainy summer so without a top yet, no interest in being in a hurry to get it on the road.


Posted by: BMIC
« on: September 13, 2013, 03:29:49 PM »

Thanks Steve, great thread...
Posted by: athawk11
« on: September 13, 2013, 11:03:58 AM »

Great write up, and a very nice accessory.

Tim
Posted by: SteveW
« on: September 12, 2013, 04:00:27 PM »

Here is the cable lock it is stranded cable with barrel crimps and looped. I run it through the opening where the tailgate chain hangs and then both loops through the padlock which secures the tool strap. Obviously with tools it could be broken into but at least it will take a little bit of time and thwart an opportunist from grabbing and running. It also balances well and it is easy to carry when it is off the jeep and that was why the tools were laid out different than initial pics. It was a fun project and it's practical to boot.
Posted by: SteveW
« on: September 12, 2013, 03:48:43 PM »

I knew I had a pick of it after painting. A redneck wind chime in the back yard.  8-)
Posted by: SteveW
« on: September 12, 2013, 03:42:36 PM »

Here is attachment to the tub. It was buggered pretty badly so when I got my tailgate surround I put in a little bit of angle iron to support and stiffen the metal. I am at some point going to build the tailgate extension box and wanted a little more beef to attach it to so why not use it for the rack. it is 3/4" square tubing and I offset it with a spacer to get it over the angle and put on the little stop piece so it would stay parallel with the tailgate


Here is some flat stock welded to frame and it rests in the opening where the tailgate hinge is. It keeps it plumb to gate and no big deal with paint scratching since it will get scratched opening the tailgate anyway

That established the bottom and it doesn't matter if the top sits up a bit as the bows on the CJ's are fixed so folding them back like military bows isn't a concern. I also got 3' pieces of angle so 2 pieces 3' and 1 piece cut to 18" I had no waste.
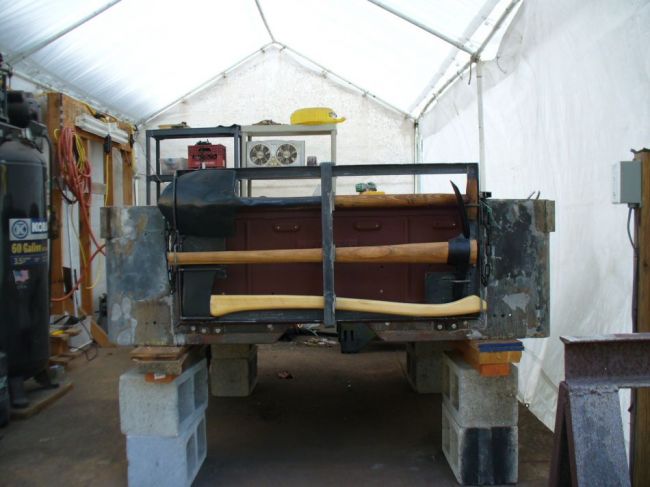
Here is the tubing closed off to keep water out and I drilled a hole through it and the angle on the tub


I was able to paint it with automotive primer and paint same time as doing my body. I debated on keeping it same color as body or black for contrast but decided same color looked better

Here it is painted and I drilled and tapped the angle on the tub 10/32 thread and ran brass screws down through the tubing and into the angle to keep it secure. It can't bounce or slide this way as it is flat on flat

Loaded up just had to figure out how to keep it a little more secure from thievery

Posted by: SteveW
« on: September 12, 2013, 03:10:07 PM »

Thanks, it attaches to the tub and uses part of the tailgate. I had to quit last night as I was getting goofy and posting double pics.
Posted by: macrisel
« on: September 12, 2013, 10:25:58 AM »

Very cool!  It looks like there was a lot of thought that went into the layout and design of the tool rack.  I would say it follows along very nicely with Willys original design of being a functional, utility vehicle.

How did you attatch it to the tailgate or is it bolted to the draw bar?  If it is on the tailgate, does it seem like too much weight on it?
Posted by: Haines Garage
« on: September 11, 2013, 11:24:58 PM »

Steve that is Very Nice! I love the idea of mounting that system on the back of your Jeep. I am Nut for the Axe, and Shovel, I have a restored pick axe as well....Thanks for sharing the pics!
Posted by: SteveW
« on: September 11, 2013, 11:20:42 PM »

Here is hold down strap. it is 1 1/4 flat and 1/4 rod for the locking loop and middle pieces to keep handles secured

bent and drilled for padlock
OOPS, will find right pic later!
Handle stops, I found without that little spacer you could lift head of axe and twist it out for removal

Welded a hinge and it drops away nicely for tool removal

Posted by: SteveW
« on: September 11, 2013, 11:07:56 PM »

Pick holder, I decided to keep it intact instead of making to stow 2 pieces. This rack allows for each tool to be taken out individually without removing the others and I had to also think about securing the tools from thievery.

Ring for pick and a rest for top of handle

Handle loop


Tools loaded, the middle piece is 3/4" square tubing and it will be part of the securing tools

Test fit and also looking at how to attach it to jeep
Posted by: SteveW
« on: September 11, 2013, 10:54:37 PM »

This was for axe holder and the plate is a mounting template for a bollard light. I am an electrical contractor so saving pieces and parts can come in handy


Loop for handle, bear in mind my axe has a flat handle, some also have a swell at the end so you would have to adjust the loop accordingly


2 down, see how easy that was