The CJ3A Page CJ3B.info

Post reply

Warning: this topic has not been posted in for at least 120 days.
Unless you're sure you want to reply, please consider starting a new topic.

Note: this post will not display until it's been approved by a moderator.

Name:
Email:
Subject:
Message icon:

Verification:
Type the letters shown in the picture
Listen to the letters / Request another image

Type the letters shown in the picture:
Write the word between words Jeep from this JeepWILLYSJeep?:
How many slot has a GPW grill?  7 - 9 - 11:

shortcuts: hit alt+s to submit/post or alt+p to preview


Topic Summary

Posted by: SteveW
« on: August 10, 2015, 05:43:56 PM »

Ha! as an electrical contractor I can appreciate the dog aversion therapy. Here is the contents I will keep inside. Other than a Mini Mag flashlight and a little drink/snack bag it's plenty good enough. I can take out the poncho (in the roll bag) and the canteen if I need any space for anything like food items


Posted by: macrisel
« on: August 10, 2015, 01:50:36 PM »

Very nice!  I love projects like this.  I was raised on a farm where we hardly ever threw anything away because we would usually use it for something else down the road.  Seems in todays world the new word is "repurposing" an old object into something new......

Whatever.  Dad always just said "Don't throw that way!  We may need it someday!" :)  Between my Grandpa, Dad and myself we have several creations from old parts and pieces! 

My favorite of all time is when my Grandpa was having problems with stray dogs sneaking in and eating his dog food.  He always had a broken lamp or other plug in appliance around so took a looong wire off of one of them bolted it to a metal dog pan.  He then waited paitently in hiding for the stray dogs to sneak in.  When they had their head buried in the bowl of food, he would plug in the cord and give them a shock!  It didn't take long to convince the strays to go somewhere else!
Posted by: Quebec Jeep
« on: August 09, 2015, 09:14:56 PM »

Very cool!
Posted by: SteveW
« on: August 09, 2015, 06:35:02 PM »

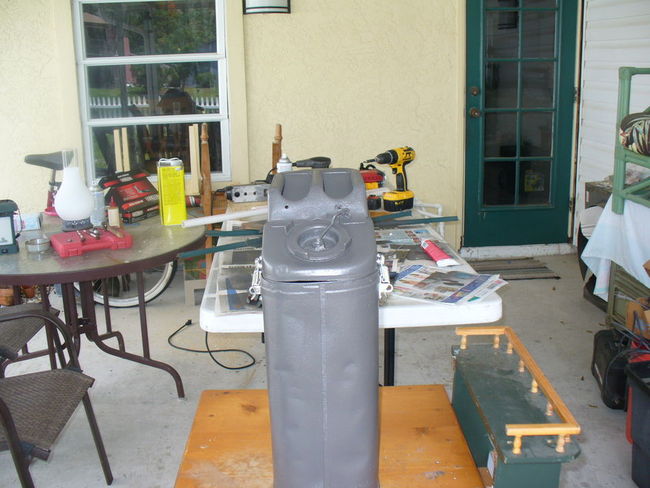
Ready for putting it back together. I cleaned can and sprayed it with Ospho, wiped residue off with scotch brite pad and just used paint on hand. Inside black and outside bronze.


Back is 2 1/2 zinc hinge with 1/4-20 bolts/lockwashers and nuts

Put 2 draw latches on each side as 1 in the front would not keep the sides lined up. Had to put them where it kept sides in the best position so they are not same on each side


Put some caulk under cap before I threaded it on. I am pretty happy with it and it will hold a lot of stuff.
Posted by: SteveW
« on: August 09, 2015, 06:18:33 PM »

Bottom inside is a piece of 3/4 plywood. I screwed it to the bottom with 4 3/4" stainless steel screws


Welded band and welded piece into bottom of can


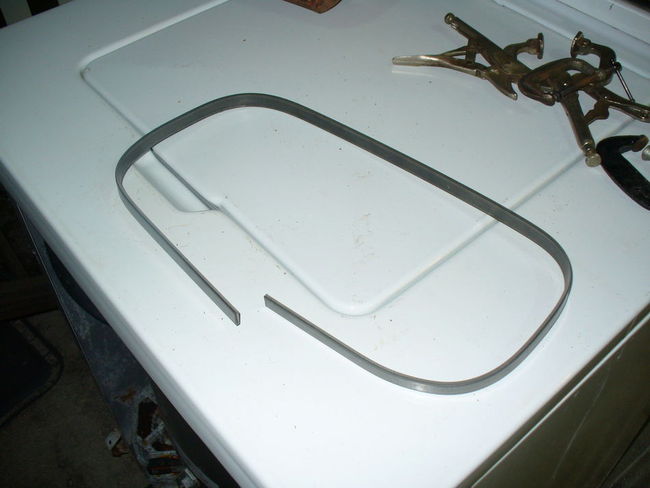
Fitted band to can. Put it at highest point and then leveled it off going around. Used steel rivets in corners first then along sides

Posted by: SteveW
« on: August 09, 2015, 05:49:15 PM »

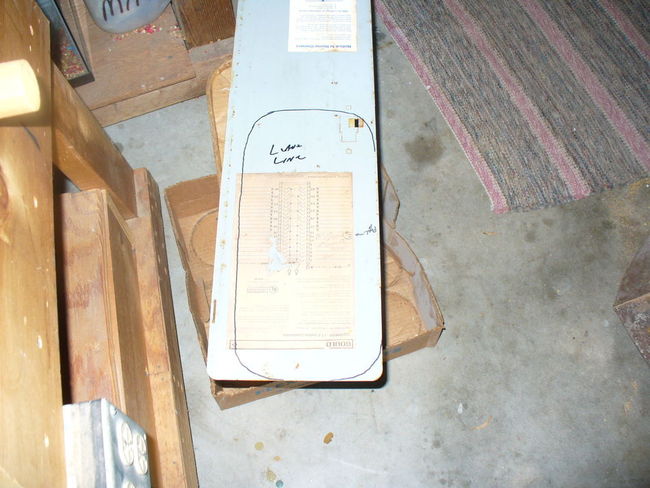
Made a plate to cover the bottom, cut a cardboard template and fit it then cut out piece from a door of an electrical panel I had changed. Nice thick metal and welds really nice


Cut with jigsaw and used bench grinder to make it fit inside bottom


Top is really flimsy with seam removed so I bought a piece of 1/8 x 1/2" flat stock and bent it for inside of can. Just have to hand bend it to fit


Posted by: SteveW
« on: August 09, 2015, 05:41:01 PM »

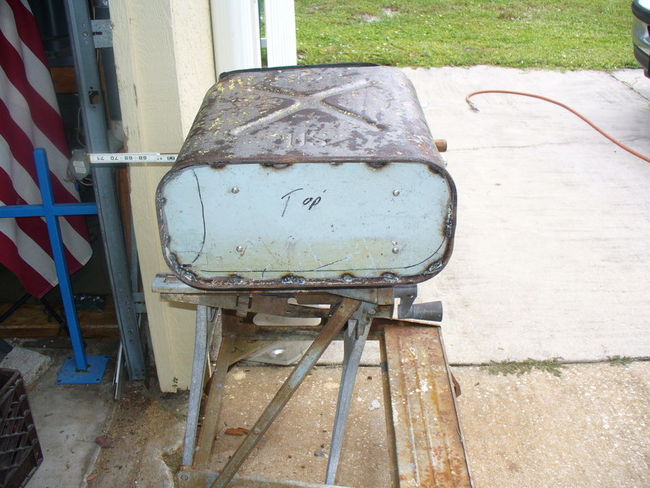
Cleaned with a needle scaler. I had never used one before and bought one at Northern Tool. Very nice to have


Cut can just below seam. Ref note in top post about getting a good cut


Too rusty to save indeed!


Posted by: SteveW
« on: August 09, 2015, 05:33:49 PM »

Can was from the 70's


Posted by: SteveW
« on: August 09, 2015, 05:25:40 PM »

Noticed a couple places where old jerry cans have been used for other purposes. I guy made a bar and another a tool box. I had and old can from the 70's not worth fixing and decided to make a container for stuff on a day trip just grab and go which is kind of my style. It was fun. 2 things I will mention here so just ignore them in the pics is I started to cut the can with a cutting wheel. It was too thick, slow and hard to control so I switched to an air saw and it worked well. I also thought about bending the top of the bottom portion in to hopefully set lid down over it and it didn't work so unless you have a tool that will do it I would forget about it. Pic's to follow