The CJ3A Page CJ3B.info

Post reply

Warning: this topic has not been posted in for at least 120 days.
Unless you're sure you want to reply, please consider starting a new topic.

Note: this post will not display until it's been approved by a moderator.

Name:
Email:
Subject:
Message icon:

Verification:
Type the letters shown in the picture
Listen to the letters / Request another image

Type the letters shown in the picture:
Write the word between words Jeep from this JeepWILLYSJeep?:
How many slot has a GPW grill?  7 - 9 - 11:

shortcuts: hit alt+s to submit/post or alt+p to preview


Topic Summary

Posted by: stony
« on: March 07, 2019, 04:23:18 PM »

Posted by: Brad Y.
« on: March 07, 2019, 02:09:40 PM »

Thanks for the response. I will look into that more. I am glad to hear that it might be possible to use the original style master cylinder since I had one on hand already to swap in. I was initially thinking just doing the fronts but the price difference won't be much to go with all 4 wheels.

It sounds like you will get to yours before I do. I would love to hear how it goes for you and if you think the stock cylinder is sufficient.
Posted by: stony
« on: March 05, 2019, 01:27:29 PM »

Yeah I have done a bunch of research on the conversion and here is what I came up with:
The stock (Single cylinder) Jeep master cylinder will work, however you need to remove the residual check valve or replace it with a lower pressure one, as the disk breaks do not need it.  The check valve retains some pressure in drum brake cylinders so that they need less fluid to activate them.  This being the case I don�t think you can do front discs and rear drums with the stock cylinder, however if you went to a dual master cylinder you can do it as you retain the check valve for the rear brakes.  The other thing you need is a proportioning valve in the line to the rear brakes.  That is so you can properly balance the brakes because the fronts do 60% of the breaking and you do not want the rears locking before the fronts.  I am thinking about doing all 4 in the spring, and will keep my stock cylinder.
Posted by: Brad Y.
« on: March 04, 2019, 05:23:48 PM »

I have been doing some more research into the brake system of the older Willys and have a question before I do the conversion from drum to disc. I would appreciate any feedback.

With the conversion to disc brakes did you change your master cylinder?

Has anyone just done the front brakes to disc and kept the back drum? Did you change your master cylinder?

Everything I am reading says that you should change because of the amount of fluid required for disc brakes vs drum brakes. I would like to get better brakes but want to make sure I account for everything required when I do them.


Posted by: Dutch_Jeeper
« on: December 09, 2018, 05:59:04 PM »

Nice write up  :)

About removing the wheelstuds when they are swaged, pounding or pressing them out is not the best way to do it because it can damage the hub. I'm in the middle of the discbrake upgrade myself and had to remove the studs to.

I cut them level with the hub, then used a 14.5 mm drill (biggest i have, i think with a 16mm and perfect centering you can cut away the swaged part in one go) Then used a dremmel to grind away as much af the swaged edge left and then used a punch and hamer and they came out with very little effort and no damage to the holes for the wheelstuds. I read that it can be hit or miss when pressing or hammering them out and not damaging the hub. The major issue can be that the holes in the hub are widened and you have to weld the studs on the back so they dont rotate.

Posted by: squidtone
« on: September 04, 2018, 10:03:07 PM »

That's absolutely fine and I get it...if someone is going to put lots of time into it and make jigs and stuff, I respect their decision to not let it out in the wild. It's great to see cool simple reversible mods for these Jeeps on threads like this.
Posted by: mtnman37879
« on: September 03, 2018, 01:19:47 PM »

Just buy the parts. Brenan did all the work so he should be compensated.
Posted by: Gunslinger
« on: September 03, 2018, 09:42:34 AM »

You could ask Brenan to share his drawings with you, might be a charge and maybe a non compete involved.
Posted by: squidtone
« on: August 09, 2018, 09:00:48 PM »

Fantastic write up! Thanks for taking on the arduous task of doing the job AND documenting it.
One question: does anyone have a drawing of the caliper adapter plate? I'm one of the few nut-jobs who would like to make my own. (I have a CNC, and an account with McMaster Carr).
I suppose I can figure it out myself when I get my hands on the calipers themselves (to figure out the caliper mounting circle diameter) but it'd be nice to make the plates up-front while I patiently gather other parts.
But great work. Looking forward to the final report!
Dave (squidtone)
Posted by: DaveW
« on: August 08, 2018, 12:48:19 PM »

Quote
This is a very complete and accurate write up, I would suggest that we pull it down and put it in the Resource Section as well.� Maybe Pascal can get on that.� It would be good to keep this where we won't lose it.
Nice Job.
Thanks

Thanks!

I hope to add more to it. I made a few changes to my install last nights that I'll have to update and comment on.
Posted by: Gunslinger
« on: August 08, 2018, 11:08:56 AM »

This is a very complete and accurate write up, I would suggest that we pull it down and put it in the Resource Section as well.  Maybe Pascal can get on that.  It would be good to keep this where we won't lose it.
Nice Job.
Thanks
Posted by: Brad Y.
« on: August 07, 2018, 07:07:27 PM »

Thanks for taking the time to do this more detailed write up. I am sure I will have questions when I get around to doing mine next summer (hopefully).
Posted by: DaveW
« on: August 06, 2018, 11:06:13 PM »

Performance

I haven't quite finished my installation yet, but I plan to review the system once I get it all together and some miles on it and put my overall review here.


Update 8/16/18
I finally got my wheels and tires situated and took the jeep for a drive this evening. All I can say is WOW. The disk brakes make a HUGE improvement over the stock 9" drums.

Posted by: DaveW
« on: August 06, 2018, 11:05:19 PM »

Wheels

The one other point of confusion with this whole upgrade was what wheels would actually fit. If you remember back to the 15" later CJ wheels I had, there was mixed messages over what would fit and what wouldn't. Well it turns out they didn't fit. They didn't clear the calipers and hit right where the inner sections mates with the outer.


I managed to find a set of wheels local to me. Unfortunately I didn't inspect them close enough before getting home because I soon learned that out of four wheels, I had three different styles, but it ended up being a mixed blessing because I can now share what wheels do and don't work.


These are early style 16" Kelsey Hayes wheels. Please note the flat lug nut flange area. These wheels WILL WORK.


These are later style 16" Kelsey Hayes wheels. Please note the flat lug nut flange area and the step in the spoke. These wheels WILL WORK.


The third style I had was a 16" MotorWheel. Note the bumps in the lug nut area and the lug nut flange is distinctly different. These wheels WILL NOT WORK.


Posted by: DaveW
« on: August 06, 2018, 11:04:34 PM »

Installation tips and tricks


The bracket installation is pretty straight forward. I clocked mine as show for ease of routing the brake hoses, but more on that later. The spindle bolts between the bracket and the knuckle. The bolts in my knuckle were long enough to get more than a few turns of engagement. If you're don't get at least three threads of engagement, get longer bolts.


UPDATE
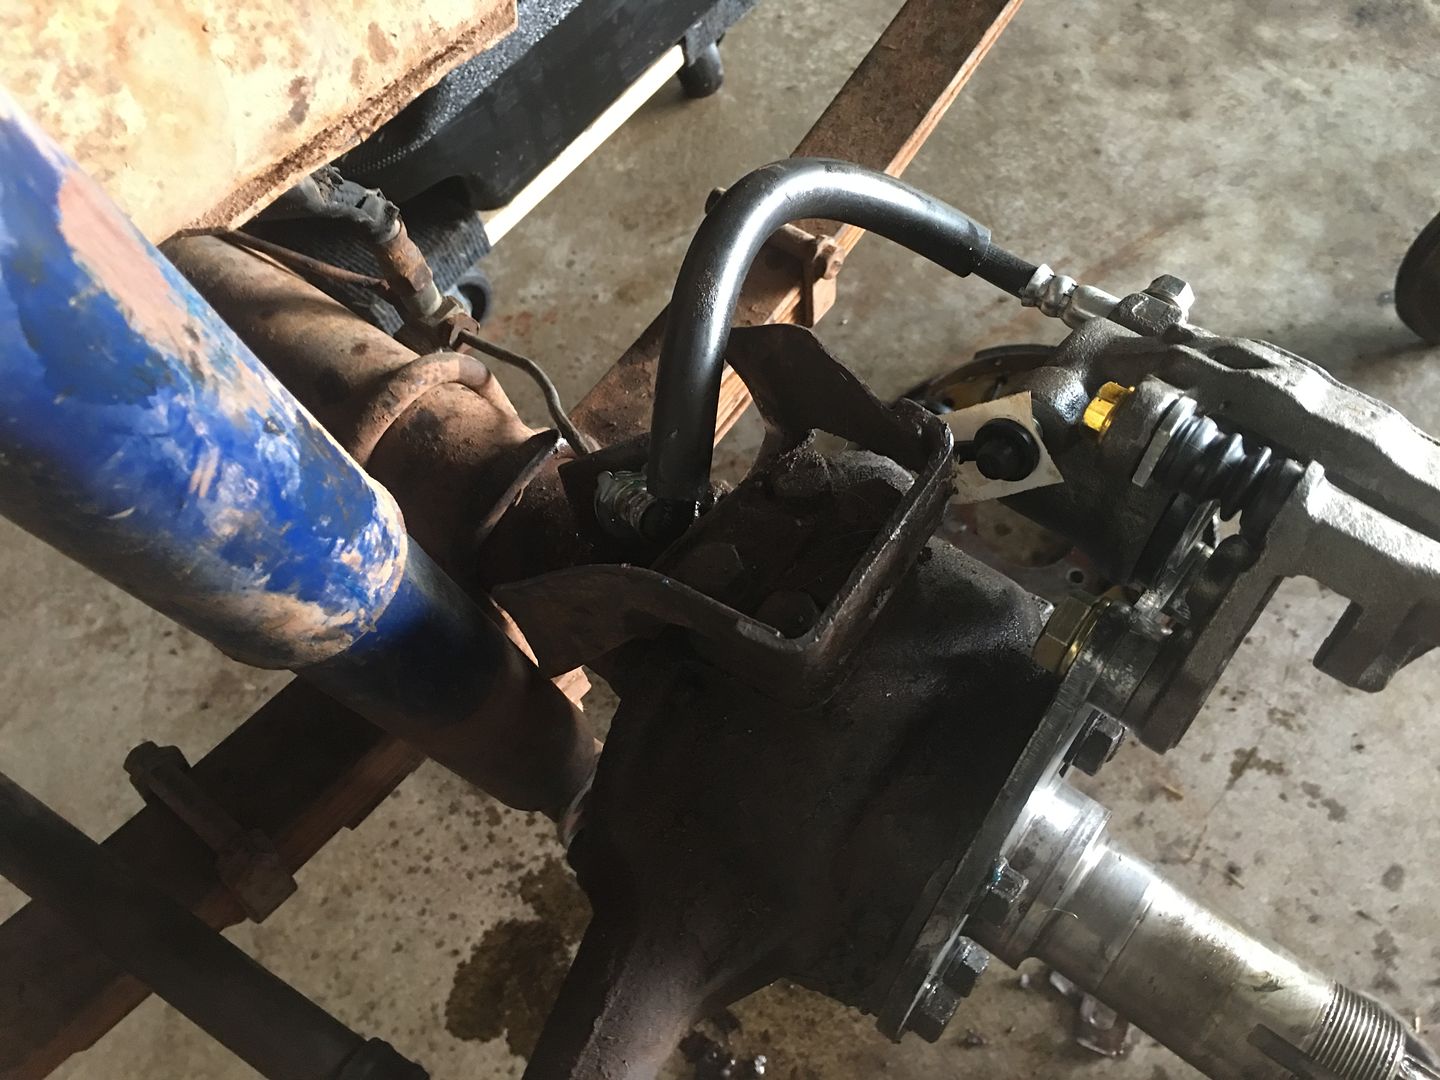
Due to the poor condition of the existing brake lines on the rear axle, I decided it would be best to replace them given all the other work I was doing (no sense in half assing it). As such, the replacement pre-bent lines were on the front of the axle instead of the rear like before. It made more sense to adjust the position of the bracket and caliper to be oriented toward the front. I needed to swap the calipers side for side to maintain having the bleeder pointing up. Here is the end result. Once I get everything working, I will eventually weld some brackets to the axles between the u-bolts to secure the lines. It was pretty simple to remove and re-clock the brackets and swap the calipers to reposition everything.


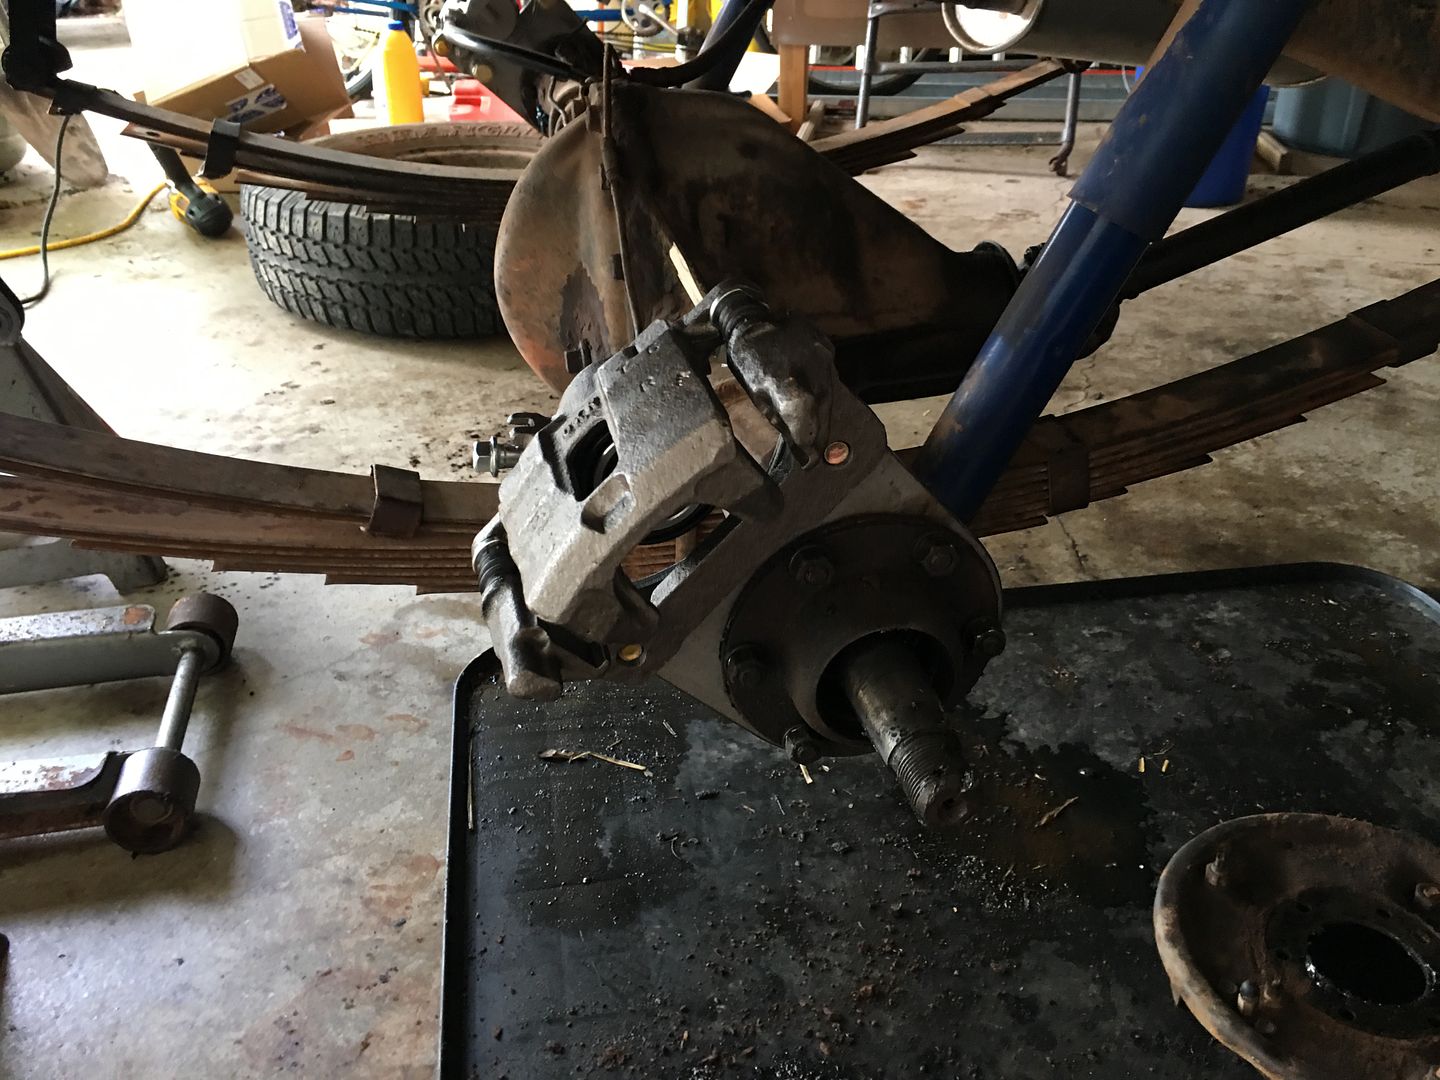
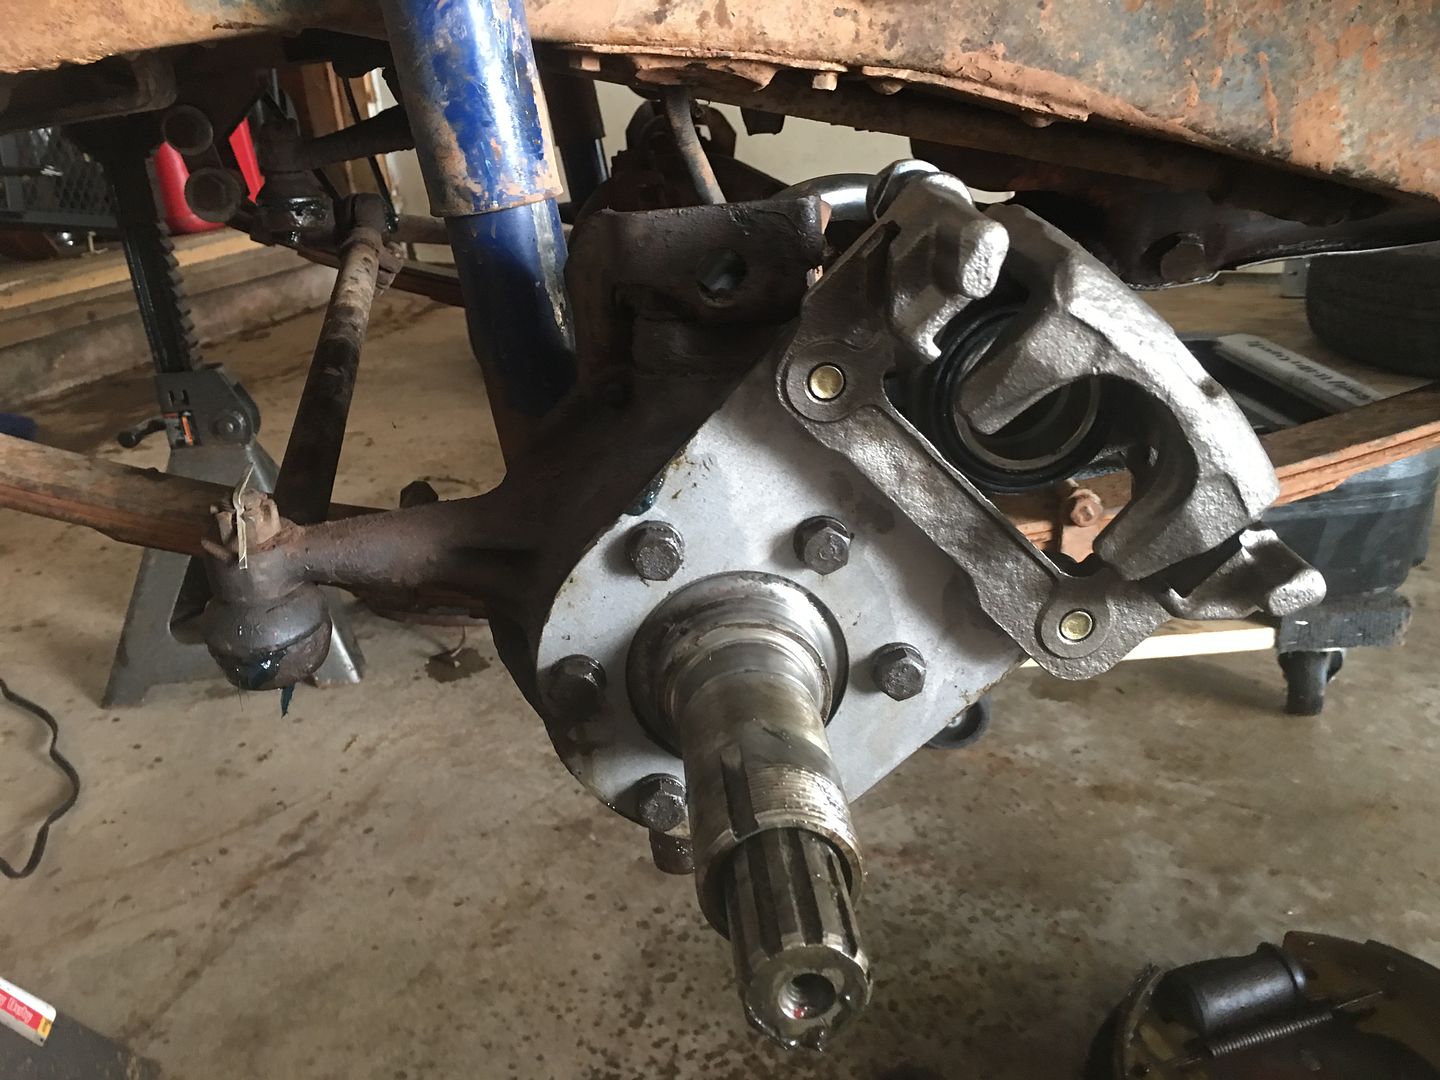
The rear brackets mount much the same way. I also chose to clock mine toward the rear because the hard brake lines on my rear axle were on the back side of the axle. With these, you need to position the shims, bearing retainer, then the bracket, then outer oil seal last. If you don't do it in this order, you will have alignment issues.


I didn't take any pictures of pressing the studs out of the drums and rotors. The fronts were fairly easy with a hydraulic press. The rears were a different story because of bring crimped/swaged. I ended up mounting the rears in my milling machine to cut the heads off the studs and pounding them out with a sledge hammer. Word to the wise, wear ear muffs as it gets loud banging on them.

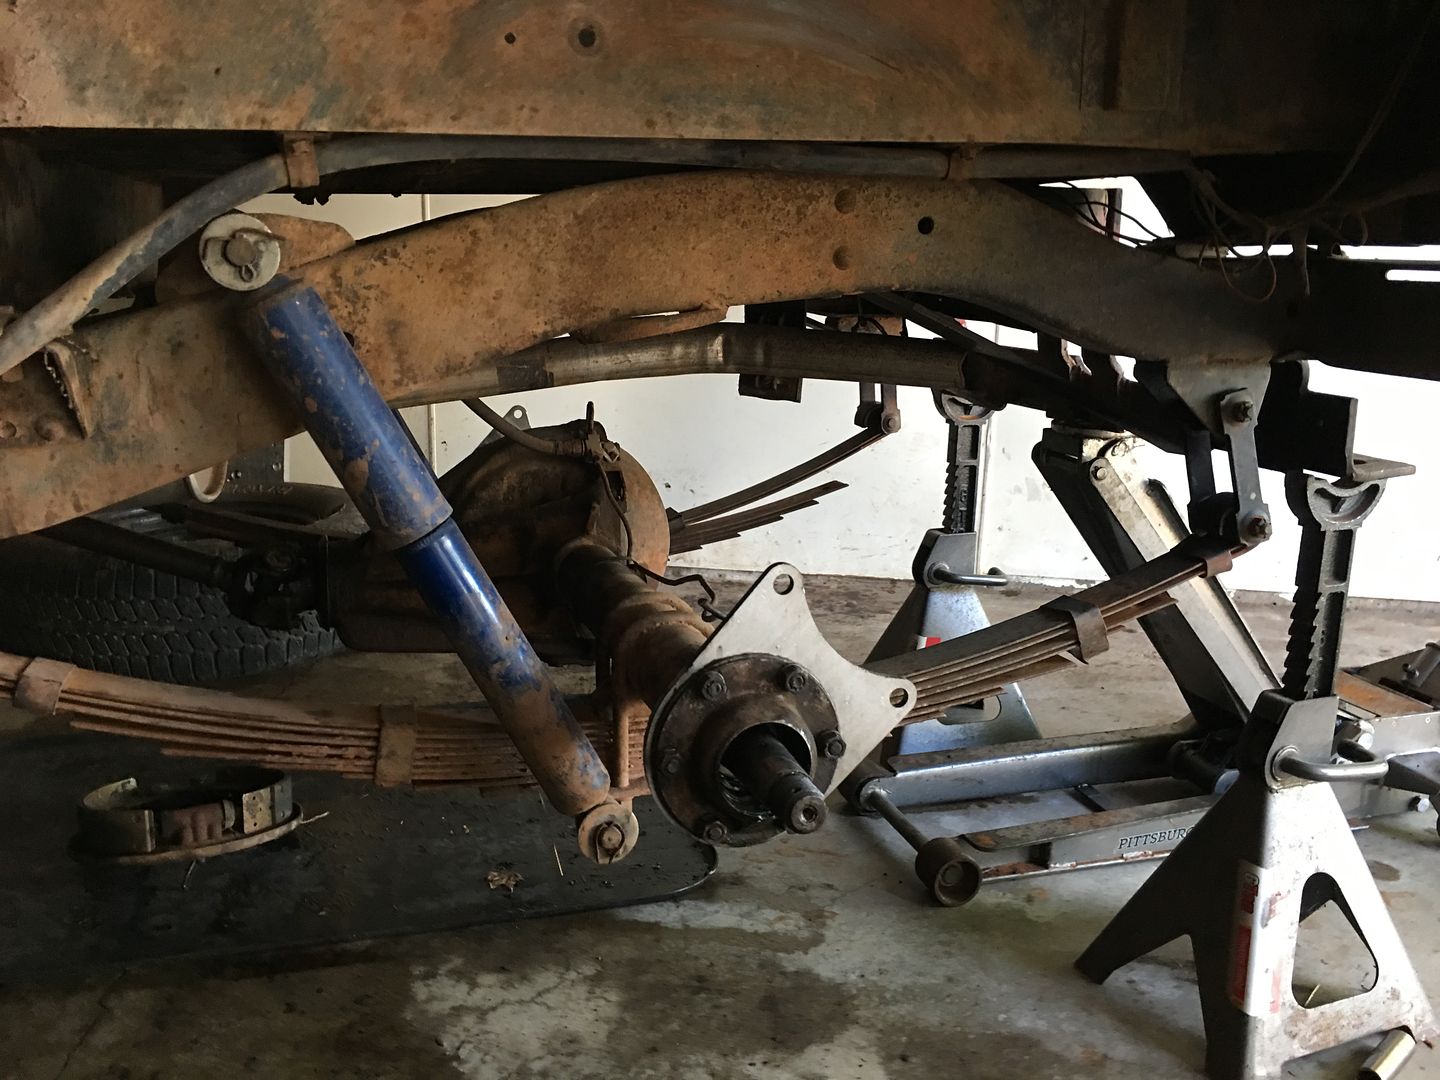
This is how the bracket and spacer get oriented. The caliper mount bracket goes outboard of all that. It's important to note that when installing and orienting the calipers, that the bleeder needs to be the highest point on the caliper, otherwise it will be darn near impossible to bleed.


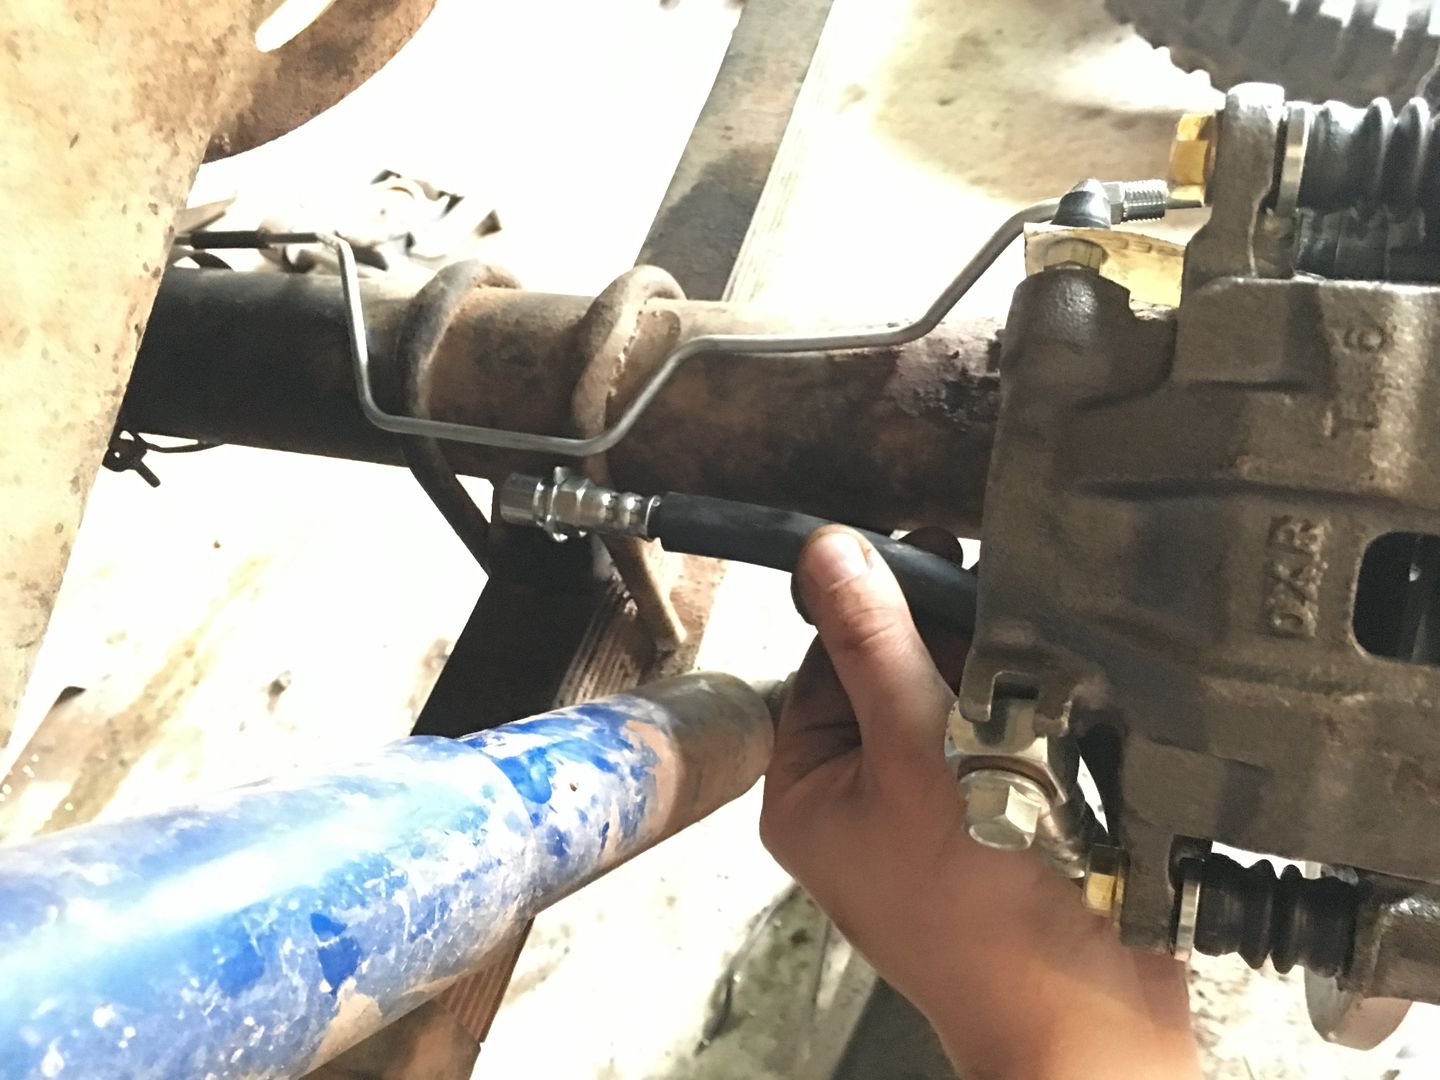
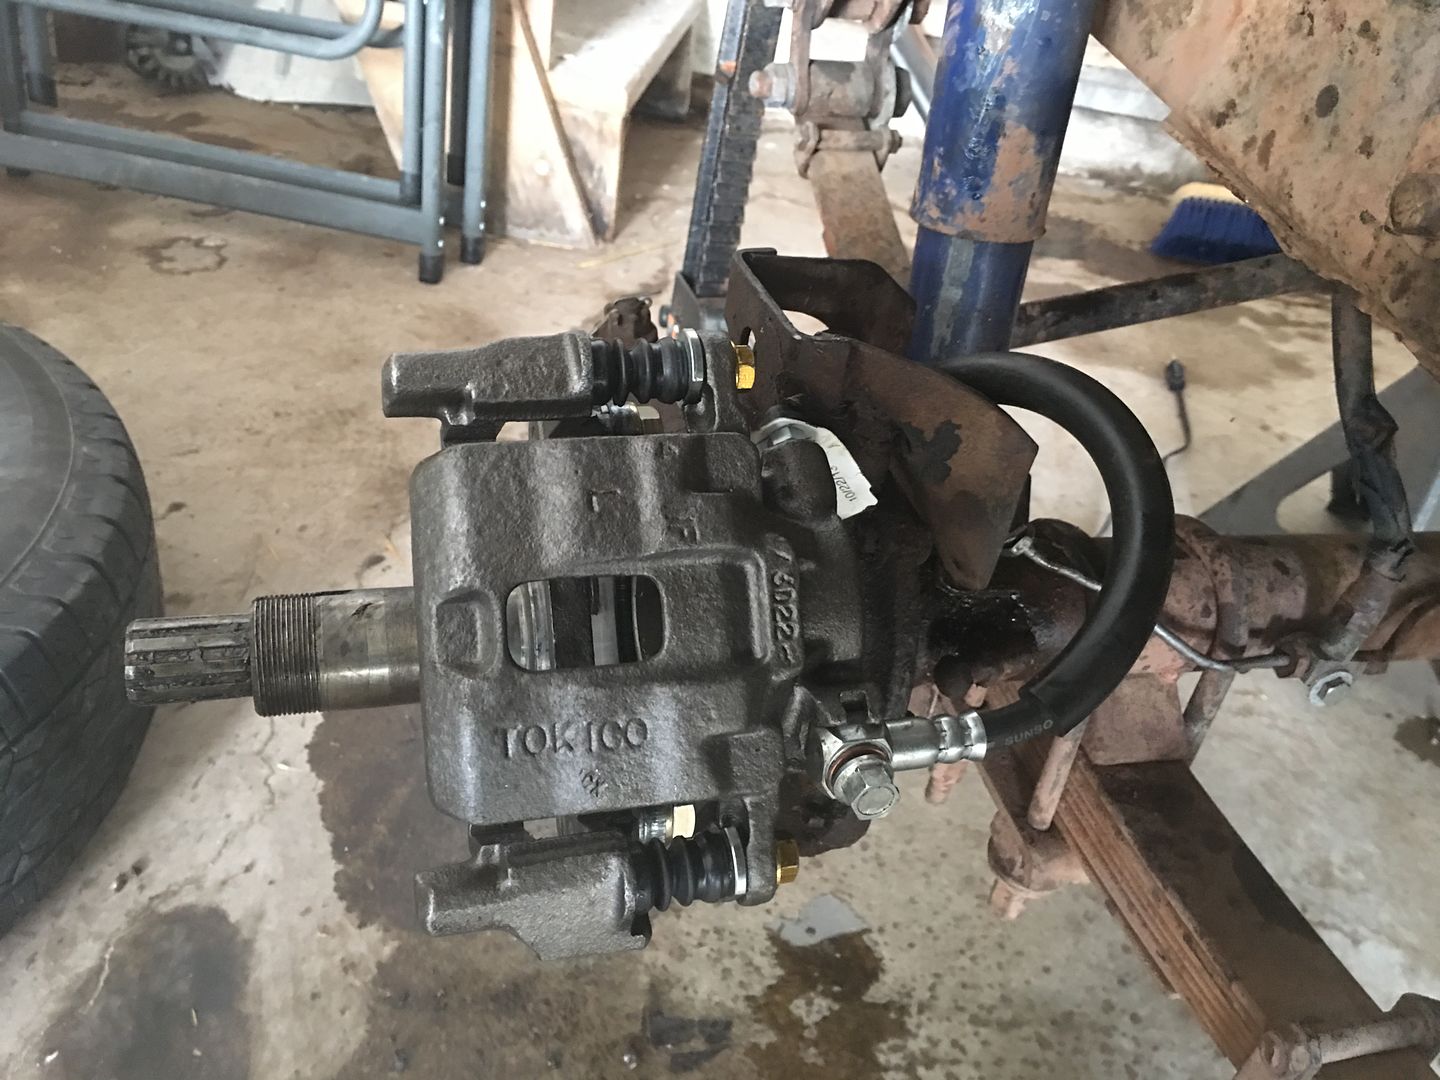
With the brake hose installed, you can visualize how I intended to connect my hard lines. I'll make a little bracket that attaches to the axle between the u-bolts so it's out of the way. Really the only modification that needs to be made to the re-used portion of the existing brake system is right here at the hard line on the rear axle. The hard line needs to be shortened and re-flared. That's it.


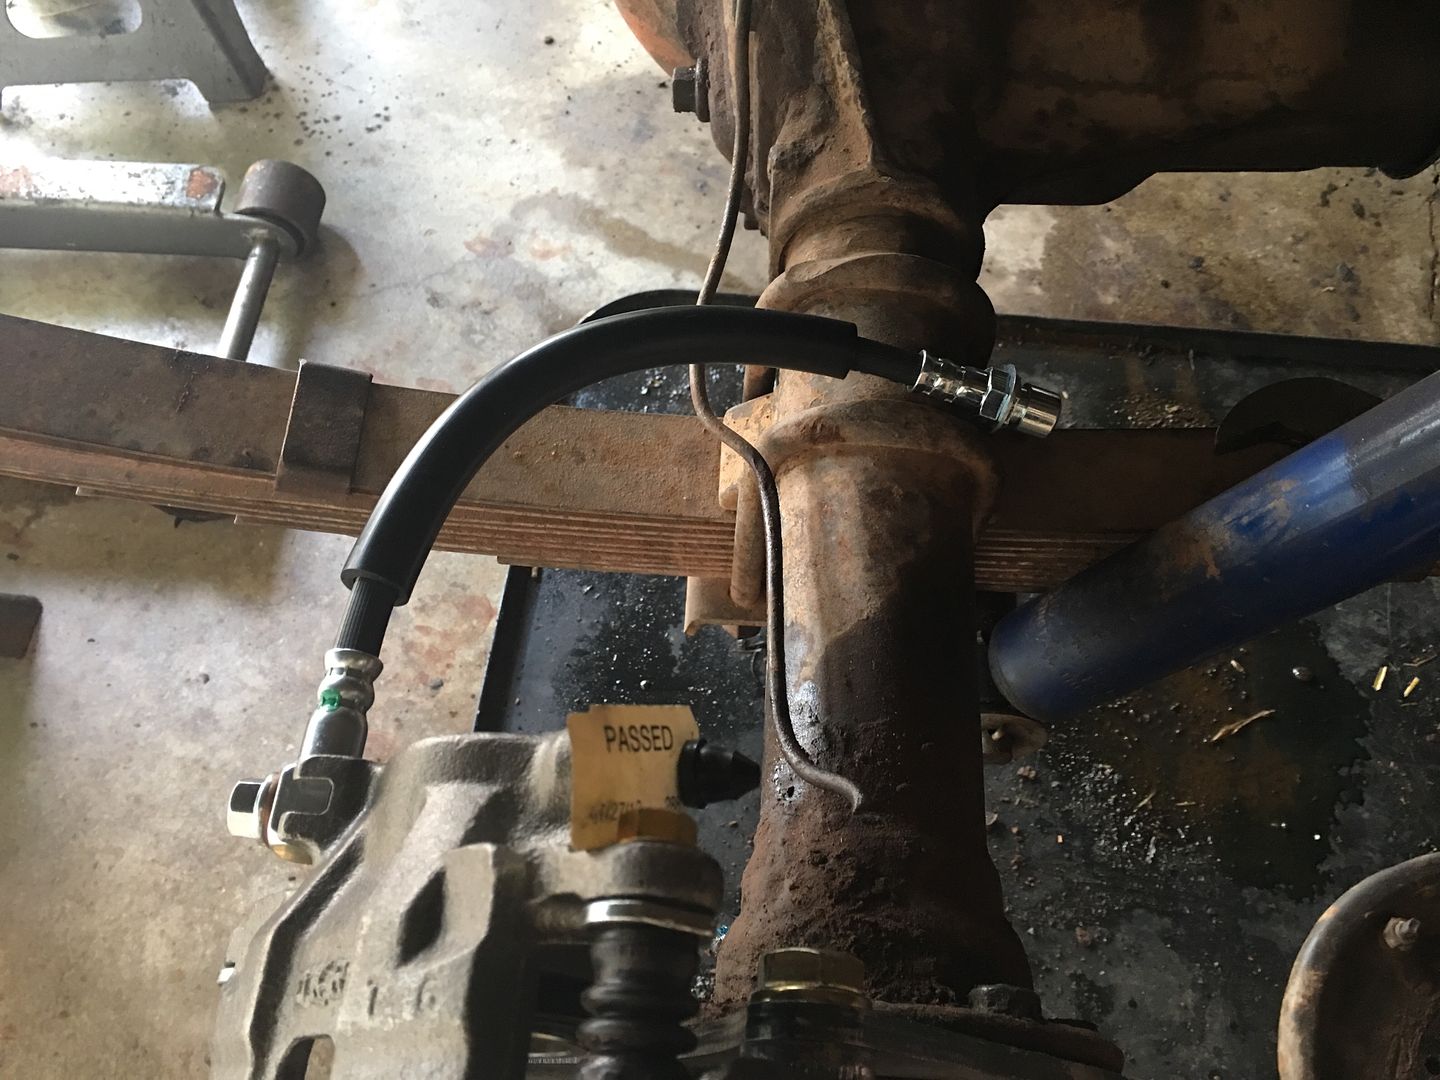
The fronts go together in a similar manner.


This shot highlights why I chose to use the S10 lines. It has plenty of length to use the existing bracket AND will mate to the factory hard line.


Update
After looking this over a bit, I did decide to remove the brackets at the upper king pins. I didn't want them to rub on the brake hoses.

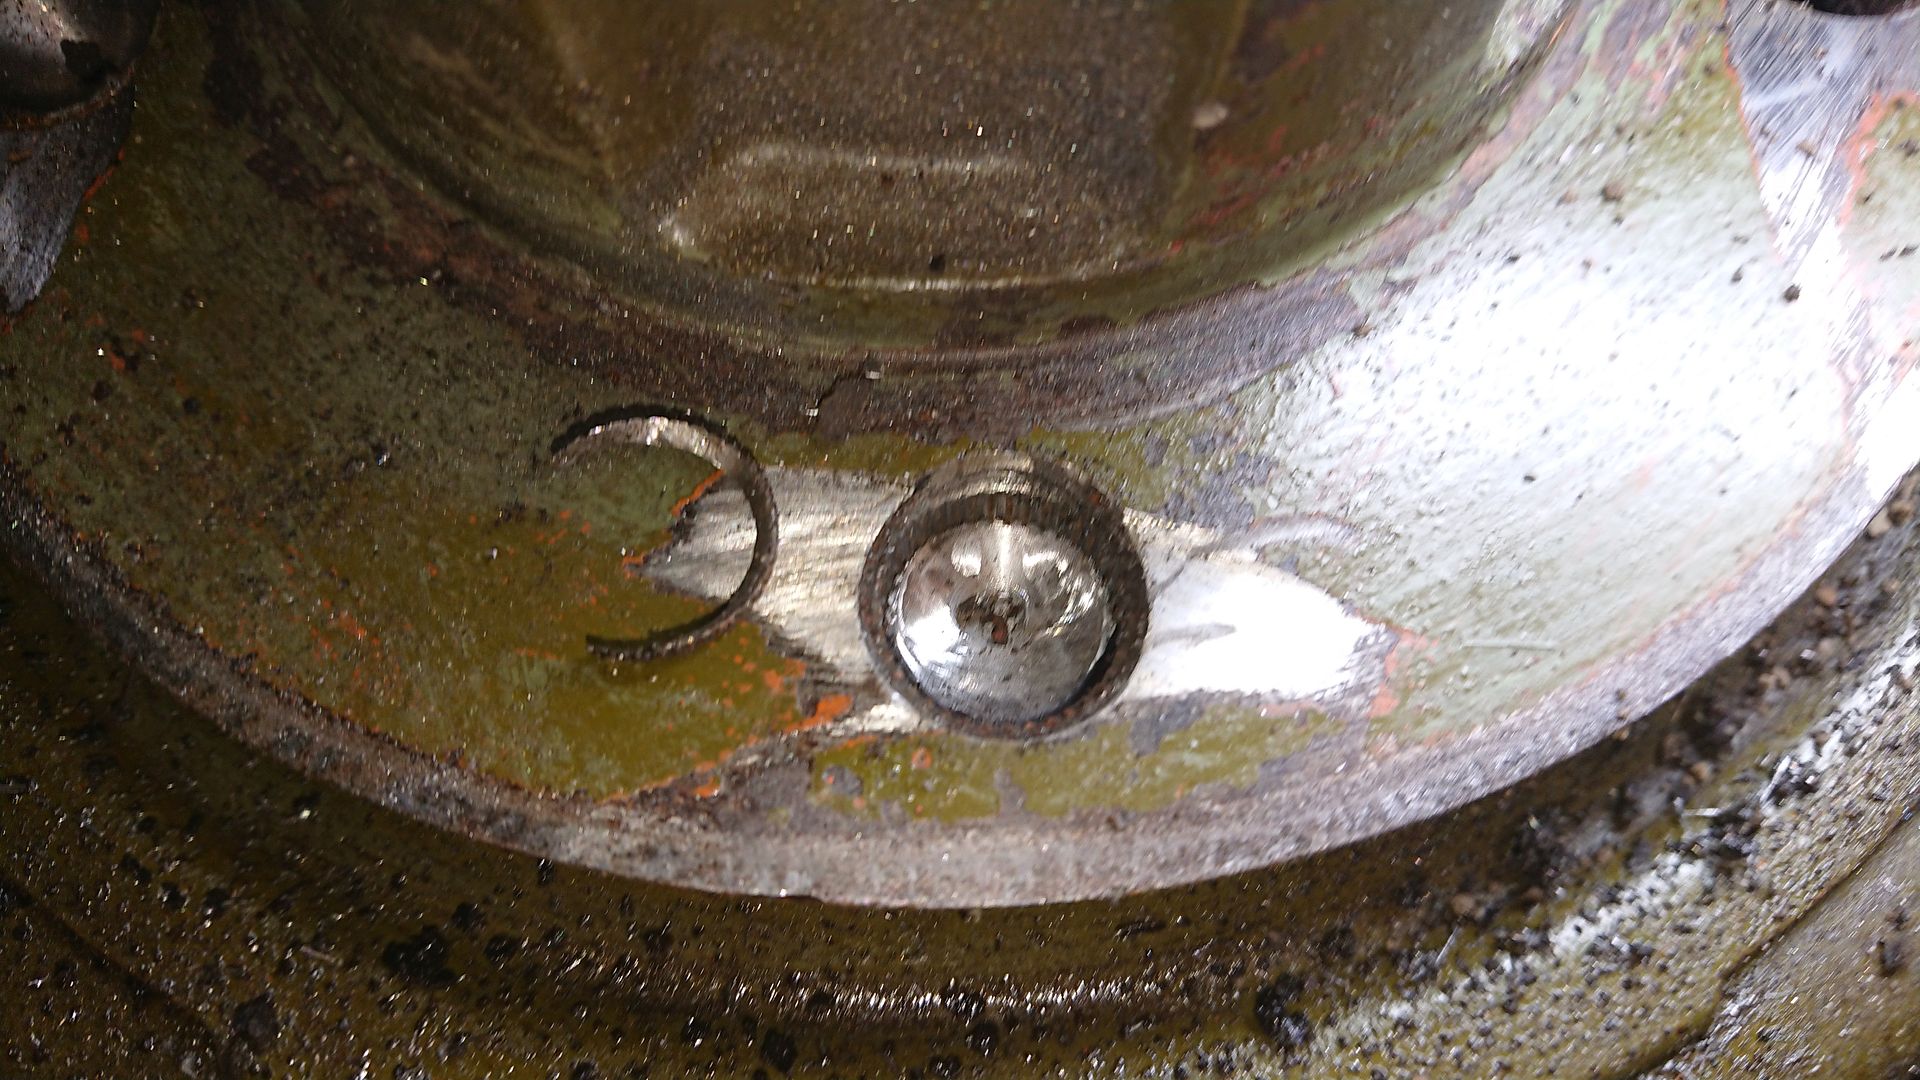
I did opt to order new lug nuts since I was replacing all the studs and mine were a horrible mix of right and left hand thread and different size hex's. One quick note on installing new studs. There are other stud recommendations out there, but the ones I referenced above seem to be the best because they have a shorter knurl on them. If you don't opt to use new studs with the shorter knurl, you will have to drill out the back side of the rotor line Gunslinger had to do in his thread - http://www.cj3apage.com/cgi-bin/3Ayabb26/YaBB.pl?num=1523122427/2


The final step was putting it all together.